NOTE: This post is part 1 of a series on developing and deploying cross-platform web apps with ASP.NET 5:
- Develop and Deploy ASP.NET 5 Apps on Mac OS X (this post)
- Develop and Deploy ASP.NET 5 Apps on Linux
- Deploy ASP.NET 5 Apps to Docker on Linux
- Deploy ASP.NET 5 Apps to Docker on Azure
- Download instructions and code for this post here: https://github.com/tonysneed/VsCode-AspNet5-OsX.
The day has arrived when you can both develop and deploy an ASP.NET application on an Apple Mac. Notice I said, develop, not just deploy. For that you’re going to need either a souped up text editor (such as Sublime Text, Brackets, Atom, Emacs or Vim) together with OmniSharp for intellisense, or you’ll want to use Visual Studio Code, the new cross-platform IDE from Microsoft that uses OmniSharp with Roslyn and provides Git integration for version control, plus limited debugging support. To get started setting up and using VS Code, check out the docs.
So why would you want to forsake full-blown Visual Studio running on Windows for a stripped down version running on OS X?
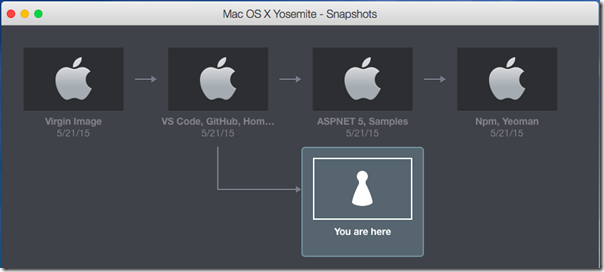
I’m not saying you should. VS Code is still in preview and, at the time of this writing, lacks support for debugging ASP.NET 5 apps (although it’s promised soon). And Microsoft offers the Community Edition of Visual Studio for free. It’s more a matter of getting out of your comfort zone and trying something different. It’s also about using different tools for different things. I happen to use a MacBook Air, mainly because of the amazing hardware, and I like how iCloud syncs everything with my iPhone and iPad. And while I have no problem running Windows in a virtual machine on my Mac using Parallels, it’s nice to hack together a web app for ASP.NET 5 on my Mac without having to fire up Win 8 and load Visual Studio, both of which gobble up a chunk of RAM. Note that while you’ll need to own a Mac, if you’re running Parallels you can create a virtual machine that runs OS X, which will allow you to create snapshots in time, so that you can easily revert to an earlier state.
To develop ASP.NET 5 apps on a Mac, we’ll start with these instructions for installing VS Code. (By the way, VS Code can also be used for TypeScript and Node.js development.) In order to launch VS Code from a Terminal window, you’ll want to add some entries to your .bash_profile file. You can check to see if the file already exists by changing to your root directory with cd ~/, and then entering ls –a, to list all files, including hidden ones (those are the ones with names starting with a dot). If .bash_profile does not exist, enter: touch .bash_profile. Otherwise if it does exist, enter open -e .bash_profile, and it will open in TextEdit. Then add the following text to the file:
code () {
    if [[ $# = 0 ]]
    then
        open -a "Visual Studio Code"
    else
        [[ $1 = /* ]] && F="$1" || F="$PWD/${1#./}"
        open -a "Visual Studio Code" --args "$F"
    fi
}
export PATH="~/npm-global/bin:$PATH"
source dnvm.sh
This will allow you to launch VS Code at any folder from the terminal window simply by typing code ., so that you can start editing files contained in that folder. It also sets up the Node package manager to install Yeoman and makes the DotNet Version Manager for every Terminal session (see below).
Next, you’ll want to install ASP.NET 5 on Mac OS X, so that you can deploy web apps on a Mac. The docs list instructions for installing ASP.NET 5 on Mac OS X, which can be summarized as follows:
- Install Homebrew with the command line developer tools
- Tap the ASP.NET 5 repo from Homebrew
- Install the DotNet Version Manager
ruby -e "$(curl -fsSL https://raw.githubusercontent.com/Homebrew/install/master/install)"
brew tap aspnet/dnx
brew install dnvm

dnvm upgrade
source dnvm.sh
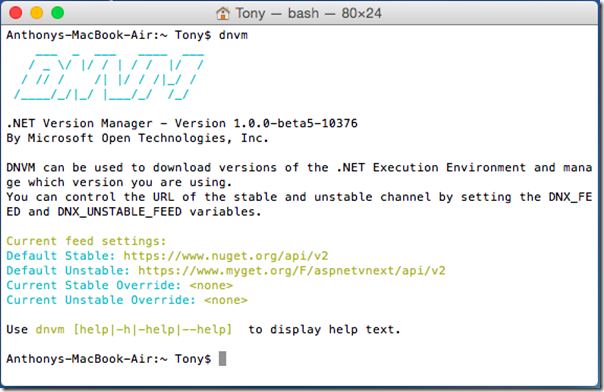
After this, entering dnvm will bring up the version manager, which allows you to select and configure different versions of the ASP.NET 5 runtime.
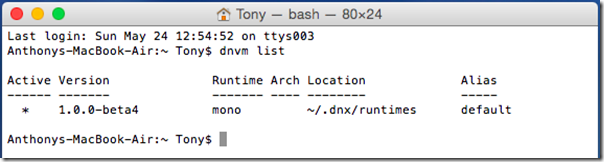
To see which versions are installed, enter: dnvm list.
Next, you’ll create a directory and fire up VS Code to create your first ASP.NET 5 app. We’ll start with a Hello World console app! The quickest approach is to grab two files from the ConsoleApp folder for the AspNet Samples Repo: project.json and program.cs.
Here is project.json for the console app, which lists the dependencies you’ll bring in.
{
"dependencies": {
},
"commands": {
"ConsoleApp": "ConsoleApp"
},
"frameworks": {
"dnx451": { },
"dnxcore50": {
"dependencies": {
"System.Console": "4.0.0-beta-*"
}
}
}
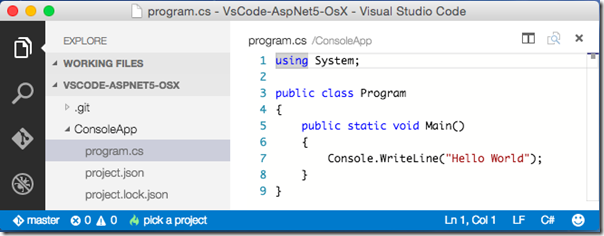
}And here is program.cs, which simply prints “Hello World” to the console.
using System;

public class Program
{
    public static void Main()
    {
        Console.WriteLine("Hello World");
    }
}
Editing program.cs in Visual Studio Code looks like this:
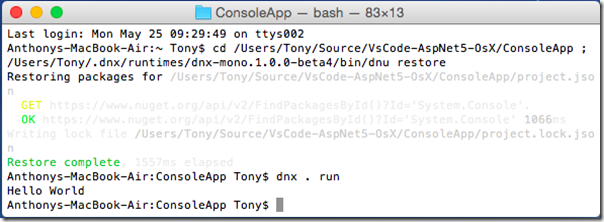
To launch the app, open Terminal at the ConsoleApp directory, then restore the dependencies and execute the program.
dnu restore
dnx . run
You should see “Hello World” printed to the Terminal window.
Console apps are well-suited for running tasks on a server, but more often you’ll use ASP.NET 5 to run web apps. The AspNet repo on GitHub has a HelloWeb sample, where you can grab two files: project.json and startup.cs.
Here is the project.json file for the web app. Notice the “kestrel” command for starting an HTTP listener on Mac OS X and Linux.
{
    "version": "1.0.0-*",
    "dependencies": {
        "Kestrel": "1.0.0-*",
        "Microsoft.AspNet.Diagnostics": "1.0.0-*",
    },
    "commands": {
        "kestrel": "Microsoft.AspNet.Hosting --server Kestrel --server.urls http://localhost:5004"
    },
    "frameworks": {
        "dnx451": { },
        "dnxcore50": { }
    }
}
Here is the startup.cs file, which configures the pipeline with an endpoint for displaying a welcome page.
using Microsoft.AspNet.Builder;
namespace HelloWeb
{
public class Startup
{
public void Configure(IApplicationBuilder app)
{
app.UseWelcomePage();
}
}
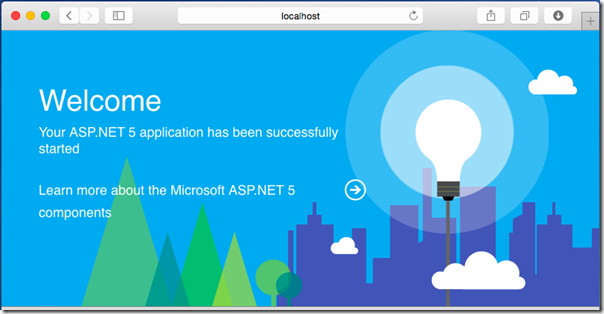
}To start the web server, restore dependencies and then enter the kestrel command.
dnu restore
dnx . kestrel
VS Code also allows you to execute commands from the command palette, which you can bring up by typing ⇧⌘P. From there enter a command listed in the “commands” section of project.json, for example, “kestrel”.

Then open a browser and enter the address: http://localhost:5004. You’ll see a message stating the web server has started. To end it, press Enter. If it does not stop, open another terminal to kill the process: ps {To see a list of PIDS} kill -9 {PID #}.
Aside from running the console and web Hello World samples, you’re going to want to develop your own applications based on templates you’d find in Visual Studio on Windows. To get a similar experience, you can install Yeoman, which scaffolds various kinds of ASP.NET 5 apps, such as MVC 6 or Web API (which is technically now part of MVC 6). To install Yeoman you’ll need the Node Package Manager, which you can download and install from here. Once you have Node installed, you can use it to install Yeoman, the asp.net generator, grunt and bower – all in one fell swoop.
sudo npm install -g yo grunt-cli generator-aspnet bower
Having installed Yeoman, you can then navigate to a directory in Terminal where you’d like to create your new app in a child directory. Then execute:
yo aspnet
This brings up a number of choices. For example, you can select Web API Application, which then scaffolds the standard Web API app with a ValuesController. If you run dnu restore and dnx . kestrel, as you did with the sample web app, you can browse to the following URL to get back JSON values: http://localhost:5001/api/values.
And that is how you can both develop and deploy ASP.NET 5 apps on Mac OS X. For the next part of this series, I’ll show you how to do the same on Linux.
| Reference: | Develop and Deploy ASP.NET 5 Apps on Mac OS X from our NCG partner Tony Sneed at the Tony Sneed’s Blog blog. |