For quite some time now, I’ve been trying .NET 2015 on Azure Virtual Machines – Windows Server and Ubuntu and have been trying my hands at Shell Scripts. I’ve also been trying IoT using Linux on Raspberry Pi, Arduino and Intel Galileo Gen 2 boards.
To avoid running out of Azure credits, this time, I thought of creating a Hyper-V based Virtual Machine of Ubuntu on my laptop that could run in parallel with Windows OS. This article will outline 5 basic steps to create Ubuntu VM on your laptop that connects to the Internet. Once I have setup Ubuntu, I can use this VM to explore more of ASP.NET vNext
Step 1: Enable Hyper-V on your Windows 8.1 / 10 laptop
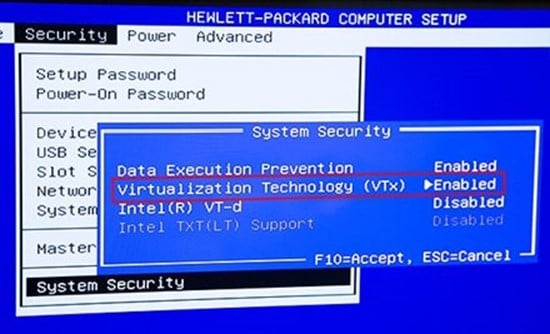
Ensure that hardware virtualization support is turned on in the BIOS settings.
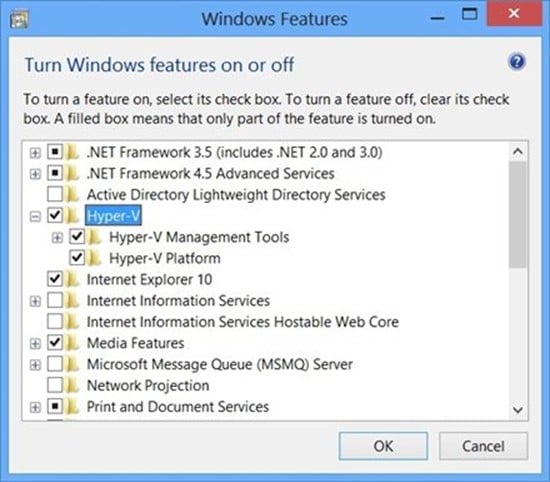
Save the BIOS settings and reboot the machine. At the Start Screen, type ‘turn windows features on or off’ and select that item. Select and enable Hyper-V
If Hyper-V was not previously enabled, reboot the machine to apply the change. Ensure that hardware virtualization support is turned on in the BIOS settings
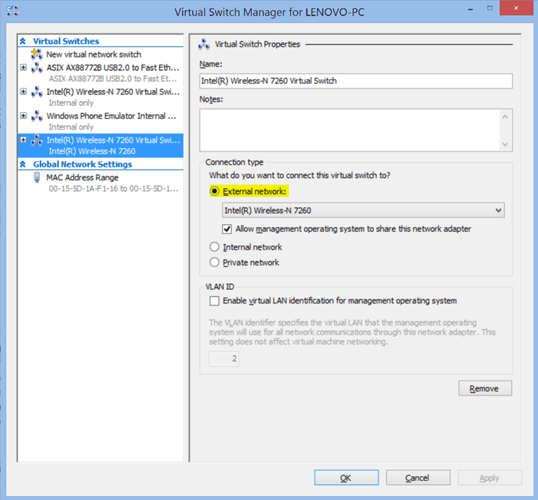
Step 2: Create a Virtual Switch for your Wireless Network
In Hyper-V Manager, select ‘Virtual Switch Manager’ in the Action pane. Ensure that you have at least one Virtual Switch that enables ‘External’ connectivity
Step 3: Download Ubuntu ISO image and Create New VHDX
Download latest image of Ubuntu ISO image – Server or Desktop from http://www.ubuntu.com/download and store it in local disk.
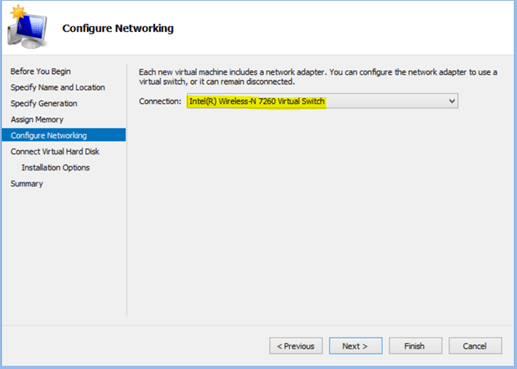
Open Hyper-V Manager, and select “New > Virtual Machine”. In the wizard, provide a friendly name like “Ubuntu VM” and select “Generation 2”. Assign min 512 MB memory and check the box “Use Dynamic Memory for Virtual Machine.”
In Configure Networking step, select the same Virtual Switch that has external network connectivity (configured in step 2)
In Connect Virtual Hard Disk, ensure that you have allocated at least 10GB of disk space. In the Installation Options, select the option “Install the operating system from bootable image file” and select the ISO file downloaded from Ubuntu.com and click Finish.
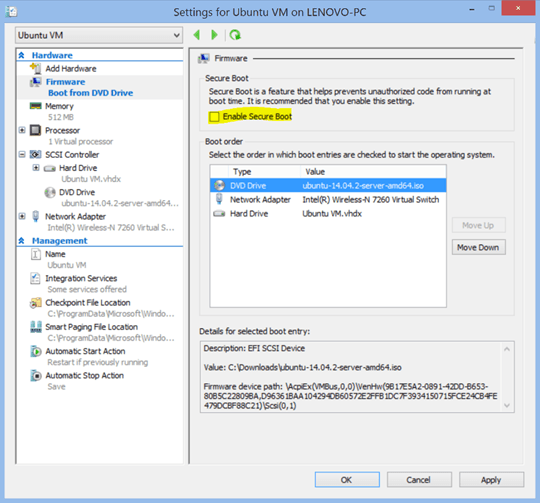
Step 4: Disable Secure Boot
In Hyper-V Manager, select the “Ubuntu VM” and click on Settings in the Action pane and uncheck ‘Enable Secure Boot’
Step 5: Start Ubuntu VM
In Hyper V Manager, right click on “Ubuntu VM” and click on Start and then on Connect. This will start Ubuntu on Hyper V.
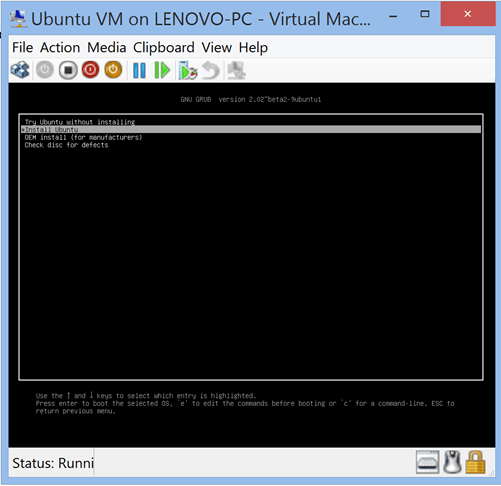
Select Install Ubuntu and press ENTER and wait for some time.
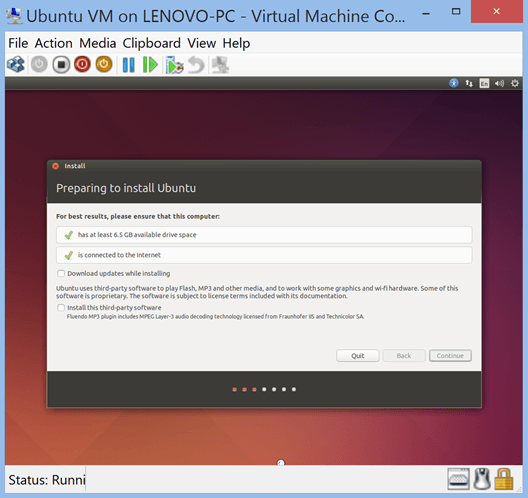
Once this wizard completes, you will have a working version of Ubuntu on your machine, running in parallel with Windows 8.1 / 10
| Reference: | 5 steps to create Ubuntu Hyper-V Virtual Machine from our NCG partner Punit Ganshani at the Punit Ganshani blog blog. |