Choosing the right architecture for Web Applications is a must, especially for large scale ones. Using the default Visual Studio ASP.NET MVC Web Application project templates, adding controllers with Scaffolding options, just to bootstrap your application and create pages and data in just a few minutes, sounds awesome for sure, but let’s be honest it’s not always the right choise. Peeking all the default options, keeping business, data and presentation logic in the same project will impact several factors in your solutions, such as scalability, usability or testability. In this post, will see how to keep things clean, creating a highly loosely coupled ASP.NET MVC Solution, where Data Access, Business and Presentation layers are defined in the right manner. To do this, we ‘ll make use of several patterns and frameworks, some of those are presented below.
- Entity Framework Code First development
- Generic Repository Pattern
- Dependency Injection using Autofac framework
- Automapper
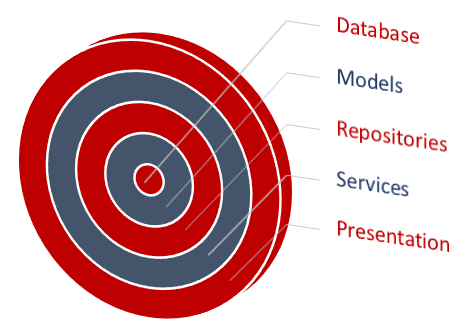
The architecture we will try to build in this post is summarized in the following diagram.
Let’s start. Assuming we want to built an e-shop Web Application called “Store”, create a blank solution with the same name.
Models
Add a class library project to the solution, named Store.Model. This library is where we ‘ll keep all of our domain objects. Entity Framework will count on them in order to build the database but we are not going to configure Code First using DataAnnotations attributes on this project. Instead, we are going to put all the Code First configuration in specific Configuration classes using the Fluent API. Add a folder named Models and add the following two simple classes.
Gadget.cs
public class Gadget
{
public int GadgetID { get; set; }
public string Name { get; set; }
public string Description { get; set; }
public decimal Price { get; set; }
public string Image { get; set; }
public int CategoryID { get; set; }
public Category Category { get; set; }
}
Category.cs
public class Category
{
public int CategoryID { get; set; }
public string Name { get; set; }
public DateTime? DateCreated { get; set; }
public DateTime? DateUpdated { get; set; }
public virtual List<Gadget> Gadgets { get; set; }
public Category()
{
DateCreated = DateTime.Now;
}
}
I preffered to keep the namespace Store.Model instead of the namespace Store.Model.Models
Data Access Layer and Repositories
The purpose of this layer, is the direct access to the database. It’s the only layer responsible to communicate with the database. If some other layer wants to access the database, then this will be done through some of the classes (repositories) we will define in this project. This will be strictly the only way Add a new class library project named Store.Data and make sure you add a reference to the previous created project, Store.Model. Install Entity Framework using the Nuget Package Manager. First thing we wanna do, is to define the Entity Type Configurations for our domain objecs. Add a folder named Configuration with the following two classes that inherits the EntityTypeConfiguration class.
GadgetConfiguration.cs
public class GadgetConfiguration: EntityTypeConfiguration<Gadget>
{
public GadgetConfiguration()
{
ToTable("Gadgets");
Property(g => g.Name).IsRequired().HasMaxLength(50);
Property(g => g.Price).IsRequired().HasPrecision(8, 2);
Property(g => g.CategoryID).IsRequired();
}
}
CategoryConfiguration.cs
public class CategoryConfiguration : EntityTypeConfiguration<Category>
{
public CategoryConfiguration()
{
ToTable("Categories");
Property(c => c.Name).IsRequired().HasMaxLength(50);
}
}
There isn’t any difficult configuration to explain, the point is just to understand where to put the right objects. The next thing we will do is to create the DbContext class that will be responsible to access the database. Add the following class under the root of the current project.
StoreEntities.cs
public class StoreEntities : DbContext
{
public StoreEntities() : base("StoreEntities") { }
public DbSet<Gadget> Gadgets { get; set; }
public DbSet<Category> Categories { get; set; }
public virtual void Commit()
{
base.SaveChanges();
}
protected override void OnModelCreating(DbModelBuilder modelBuilder)
{
modelBuilder.Configurations.Add(new GadgetConfiguration());
modelBuilder.Configurations.Add(new CategoryConfiguration());
}
}
We want to seed the database when our application fire up for the first time, so add the following class to the root of the project as well.
StoreSeedData
public class StoreSeedData : DropCreateDatabaseIfModelChanges<StoreEntities>
{
protected override void Seed(StoreEntities context)
{
GetCategories().ForEach(c => context.Categories.Add(c));
GetGadgets().ForEach(g => context.Gadgets.Add(g));
context.Commit();
}
private static List<Category> GetCategories()
{
return new List<Category>
{
new Category {
Name = "Tablets"
},
new Category {
Name = "Laptops"
},
new Category {
Name = "Mobiles"
}
};
}
private static List<Gadget> GetGadgets()
{
return new List<Gadget>
{
new Gadget {
Name = "ProntoTec 7",
Description = "Android 4.4 KitKat Tablet PC, Cortex A8 1.2 GHz Dual Core Processor,512MB / 4GB,Dual Camera,G-Sensor (Black)",
CategoryID = 1,
Price = 46.99m,
Image = "prontotec.jpg"
},
new Gadget {
Name = "Samsung Galaxy",
Description = "Android 4.4 Kit Kat OS, 1.2 GHz quad-core processor",
CategoryID = 1,
Price = 120.95m,
Image= "samsung-galaxy.jpg"
},
new Gadget {
Name = "NeuTab® N7 Pro 7",
Description = "NeuTab N7 Pro tablet features the amazing powerful, Quad Core processor performs approximately Double multitasking running speed, and is more reliable than ever",
CategoryID = 1,
Price = 59.99m,
Image= "neutab.jpg"
},
new Gadget {
Name = "Dragon Touch® Y88X 7",
Description = "Dragon Touch Y88X tablet featuring the incredible powerful Allwinner Quad Core A33, up to four times faster CPU, ensures faster multitasking speed than ever. With the super-portable size, you get a robust power in a device that can be taken everywhere",
CategoryID = 1,
Price = 54.99m,
Image= "dragon-touch.jpg"
},
new Gadget {
Name = "Alldaymall A88X 7",
Description = "This Alldaymall tablet featuring the incredible powerful Allwinner Quad Core A33, up to four times faster CPU, ensures faster multitasking speed than ever. With the super-portable size, you get a robust power in a device that can be taken everywhere",
CategoryID = 1,
Price = 47.99m,
Image= "Alldaymall.jpg"
},
new Gadget {
Name = "ASUS MeMO",
Description = "Pad 7 ME170CX-A1-BK 7-Inch 16GB Tablet. Dual-Core Intel Atom Z2520 1.2GHz CPU",
CategoryID = 1,
Price = 94.99m,
Image= "asus-memo.jpg"
},
// Code ommitted
};
}
}
I have ommitted some of the Gadges objects for brevity but you can always download the solution project at the bottom of this post. Now let’s create the Heart of this project. Add a folder named Infrastructure. In order to use the Repository Pattern in the right manner, we need to define a well designed infrastructure. From the bottom to the top all instances will be available through injected interfaces. And the first instance we will require, guess what.. will be an instance of the StoreEntities. So let’s create a factory Interface responsible to initialize instances of this class. Add an interface named IDbFactory into the Infrastructure folder.
public interface IDbFactory : IDisposable
{
StoreEntities Init();
}
You can see that this interface inherits the IDisposable one, so the Concrete class that will implement the IDbFactory interface, must also implement the IDisposable one. To do this in a clean way, add a Disposable class that will implement the IDisposable interface. Then any class that will implement the IDbFactory interface, will just want to inherit this very class.
Disposable.cs
public class Disposable : IDisposable
{
private bool isDisposed;
~Disposable()
{
Dispose(false);
}
public void Dispose()
{
Dispose(true);
GC.SuppressFinalize(this);
}
private void Dispose(bool disposing)
{
if (!isDisposed && disposing)
{
DisposeCore();
}
isDisposed = true;
}
// Ovveride this to dispose custom objects
protected virtual void DisposeCore()
{
}
}
I have highlighted the DisposeCore virtual method cause this method will make others classes inherit this one, to dispose their own objects in the way the need to. Now add the implementation class of the IDbFactory interface.
DbFactory.cs
public class DbFactory : Disposable, IDbFactory
{
StoreEntities dbContext;
public StoreEntities Init()
{
return dbContext ?? (dbContext = new StoreEntities());
}
protected override void DisposeCore()
{
if (dbContext != null)
dbContext.Dispose();
}
}
It’s time to create a generic IRepository interface where we will declare the default operations that our repositories will support. Here I added some that i thought are the most used ones, but you can extend those operations as you wish.
IRepository.cs
public interface IRepository<T> where T : class
{
// Marks an entity as new
void Add(T entity);
// Marks an entity as modified
void Update(T entity);
// Marks an entity to be removed
void Delete(T entity);
void Delete(Expression<Func<T, bool>> where);
// Get an entity by int id
T GetById(int id);
// Get an entity using delegate
T Get(Expression<Func<T, bool>> where);
// Gets all entities of type T
IEnumerable<T> GetAll();
// Gets entities using delegate
IEnumerable<T> GetMany(Expression<Func<T, bool>> where);
}
Notice that the CRUD operations are commented as Mark to do something... This means that when a repository implentation adds, updates or removes an entity, does not send the command to the database at that very moment. Instead, the caller (service layer) will be responsible to send a Commit command to the database through a IUnitOfWork injected instance. For this to be done will use a pattern called UnitOfWork. Add the following two files into the Infrastructure folder.
IUnitOfWork.cs
public interface IUnitOfWork
{
void Commit();
}
UnitOfWork.cs
public class UnitOfWork : IUnitOfWork
{
private readonly IDbFactory dbFactory;
private StoreEntities dbContext;
public UnitOfWork(IDbFactory dbFactory)
{
this.dbFactory = dbFactory;
}
public StoreEntities DbContext
{
get { return dbContext ?? (dbContext = dbFactory.Init()); }
}
public void Commit()
{
DbContext.Commit();
}
}
In the same way we used the Disposable class we are going to use an abstract class that has virtual implementations of the IRepository interface. This base class will be inherited from all specific repositories and hence will implement the IRepository interface. Add the following class.
RepositoryBase.cs
public abstract class RepositoryBase<T> where T : class
{
#region Properties
private StoreEntities dataContext;
private readonly IDbSet<T> dbSet;
protected IDbFactory DbFactory
{
get;
private set;
}
protected StoreEntities DbContext
{
get { return dataContext ?? (dataContext = DbFactory.Init()); }
}
#endregion
protected RepositoryBase(IDbFactory dbFactory)
{
DbFactory = dbFactory;
dbSet = DbContext.Set<T>();
}
#region Implementation
public virtual void Add(T entity)
{
dbSet.Add(entity);
}
public virtual void Update(T entity)
{
dbSet.Attach(entity);
dataContext.Entry(entity).State = EntityState.Modified;
}
public virtual void Delete(T entity)
{
dbSet.Remove(entity);
}
public virtual void Delete(Expression<Func<T, bool>> where)
{
IEnumerable<T> objects = dbSet.Where<T>(where).AsEnumerable();
foreach (T obj in objects)
dbSet.Remove(obj);
}
public virtual T GetById(int id)
{
return dbSet.Find(id);
}
public virtual IEnumerable<T> GetAll()
{
return dbSet.ToList();
}
public virtual IEnumerable<T> GetMany(Expression<Func<T, bool>> where)
{
return dbSet.Where(where).ToList();
}
public T Get(Expression<Func<T, bool>> where)
{
return dbSet.Where(where).FirstOrDefault<T>();
}
#endregion
}
Since the implementations marked as virtual, any repository can ovveride a specific operation as required. And now the Concrete repositories: Add a new folder named Repositories and add the following two classes:
GadgetRepository.cs
public class GadgetRepository : RepositoryBase<Gadget>, IGadgetRepository
{
public GadgetRepository(IDbFactory dbFactory)
: base(dbFactory) { }
}
public interface IGadgetRepository : IRepository<Gadget>
{
}
CategoryRepository.cs
public class CategoryRepository : RepositoryBase<Category>, ICategoryRepository
{
public CategoryRepository(IDbFactory dbFactory)
: base(dbFactory) { }
public Category GetCategoryByName(string categoryName)
{
var category = this.DbContext.Categories.Where(c => c.Name == categoryName).FirstOrDefault();
return category;
}
public override void Update(Category entity)
{
entity.DateUpdated = DateTime.Now;
base.Update(entity);
}
}
public interface ICategoryRepository : IRepository<Category>
{
Category GetCategoryByName(string categoryName);
}
You can see that the GadgetRepository supports the default operations using the default behavior and of course that’s OK. On the other hand, you can see an example where a specific repository requires to either extend it’s operations (GetCategoryByName) or overried the default ones (Update). Usually you add a repository for each of your Model classes, hence each repository of type T, is responsible to manipulate a specific DbSet through the DbContext.Set<T>. We are done implementing the Data Access layer so we can procceed to the next one.
Service Layer
What operations do you want to expose your MVC Controllers? Where is the business logic is going to be implemented? Yeap.. you have guessed right, in this very layer. Add a new class library project named Store.Service. You will have to add references to the two previous created projects, Store.Model and Store.Data. Notice I haven’t told you yet to install Entity Framework to this project.. and I am not going to, cause any database operation required will be done through the injected repositories we created before. Add the first Service file to this project.
GadgetService.cs
// operations you want to expose
public interface IGadgetService
{
IEnumerable<Gadget> GetGadgets();
IEnumerable<Gadget> GetCategoryGadgets(string categoryName, string gadgetName = null);
Gadget GetGadget(int id);
void CreateGadget(Gadget gadget);
void SaveGadget();
}
public class GadgetService : IGadgetService
{
private readonly IGadgetRepository gadgetsRepository;
private readonly ICategoryRepository categoryRepository;
private readonly IUnitOfWork unitOfWork;
public GadgetService(IGadgetRepository gadgetsRepository, ICategoryRepository categoryRepository, IUnitOfWork unitOfWork)
{
this.gadgetsRepository = gadgetsRepository;
this.categoryRepository = categoryRepository;
this.unitOfWork = unitOfWork;
}
#region IGadgetService Members
public IEnumerable<Gadget> GetGadgets()
{
var gadgets = gadgetsRepository.GetAll();
return gadgets;
}
public IEnumerable<Gadget> GetCategoryGadgets(string categoryName, string gadgetName = null)
{
var category = categoryRepository.GetCategoryByName(categoryName);
return category.Gadgets.Where(g => g.Name.ToLower().Contains(gadgetName.ToLower().Trim()));
}
public Gadget GetGadget(int id)
{
var gadget = gadgetsRepository.GetById(id);
return gadget;
}
public void CreateGadget(Gadget gadget)
{
gadgetsRepository.Add(gadget);
}
public void SaveGadget()
{
unitOfWork.Commit();
}
#endregion
}
The first and the last highlighted code lines reminds you why we created the IUnitOfWork interface. If we wanted to create a gadget object though this service class, we would write something like this..
// init a gadget object..
gadgetService.CreateGadget(gadget);
gadgetService.SaveGadget();
The other highlighted code lines denotes that any required repository for this service, will be injected through it’s constructor. This will be done through a Dependency Container we will setup in the MVC project’s start up class, using the Autofac framework. In the same way I created the GadgetService.cs file.
CategoryService.cs
// operations you want to expose
public interface ICategoryService
{
IEnumerable<Category> GetCategories(string name = null);
Category GetCategory(int id);
Category GetCategory(string name);
void CreateCategory(Category category);
void SaveCategory();
}
public class CategoryService : ICategoryService
{
private readonly ICategoryRepository categorysRepository;
private readonly IUnitOfWork unitOfWork;
public CategoryService(ICategoryRepository categorysRepository, IUnitOfWork unitOfWork)
{
this.categorysRepository = categorysRepository;
this.unitOfWork = unitOfWork;
}
#region ICategoryService Members
public IEnumerable<Category> GetCategories(string name = null)
{
if (string.IsNullOrEmpty(name))
return categorysRepository.GetAll();
else
return categorysRepository.GetAll().Where(c => c.Name == name);
}
public Category GetCategory(int id)
{
var category = categorysRepository.GetById(id);
return category;
}
public Category GetCategory(string name)
{
var category = categorysRepository.GetCategoryByName(name);
return category;
}
public void CreateCategory(Category category)
{
categorysRepository.Add(category);
}
public void SaveCategory()
{
unitOfWork.Commit();
}
#endregion
}
And we are done with the service layer as well. Let’s procceed with the last one, the ASP.NET MVC Web Application.
Presentation Layer
Add a new ASP.NET Web Application named Store.Web choosing the empty template with the MVC option checked. We need to add references to all of the previous class library projects and an Entity Framework installation via Nuget Packages as well. You may be wondering, are we going to write any Entity Framework related queries in this project? Not at all, we need though some of it’s namespaces so we can setup the database configurations for our application, such as the database initializer. And since we started with this, open Global.asax.cs file and add the following line of code to setup the seed initializer we created in the Store.Data project.
Glbal.asax.cs
protected void Application_Start()
{
// Init database
System.Data.Entity.Database.SetInitializer(new StoreSeedData());
AreaRegistration.RegisterAllAreas();
RouteConfig.RegisterRoutes(RouteTable.Routes);
}
You will also need to create a connection string element to define where you want the database to be created. Add the following element in the Web.config file and changed it accoarding to your development enviroment requirements.
Web.config
<connectionStrings>
<add name="StoreEntities" connectionString="Data Source=(localdb)\v11.0;Initial Catalog=StoreDb;Integrated Security=True" providerName="System.Data.SqlClient" />
</connectionStrings>
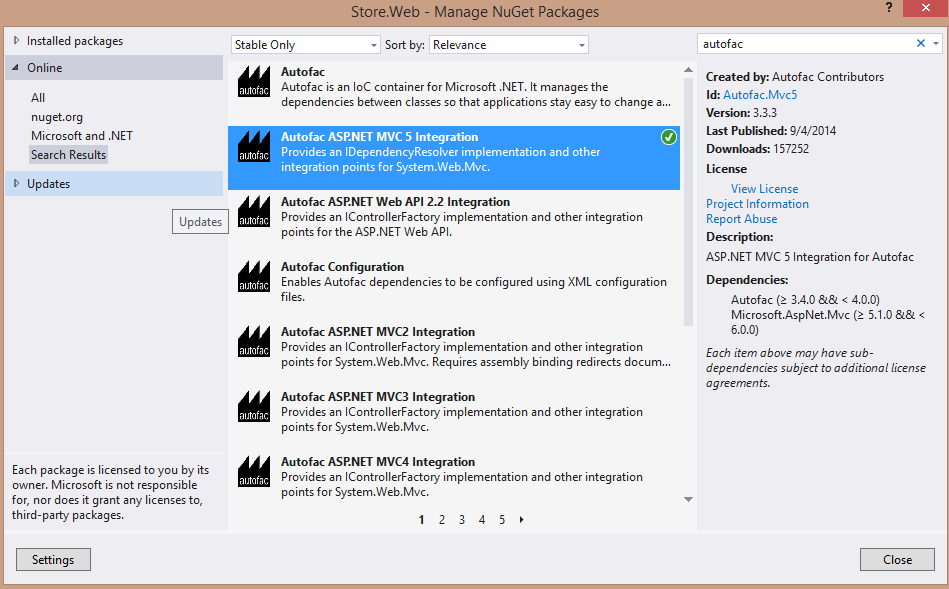
We have made such an effort in the previous steps to create repositories and services but now it’s the time to make them work all together. If you recall, all services contructors have repositories interfaces that must be injected to. The services themeselfs will later be injected in to the controllers conustructors and this is how our application will work. To achieve this, we need to setup Dependancy Injection and for thish reason I decided to use Autofac. Make sure you install Autofac ASP.NET MVC 5 Integration through Nuget Packages.
Create a Bootstrapper.cs file under the Start_App folder and paste the following code.
Bootstrapper.cs
public static void Run()
{
SetAutofacContainer();
}
private static void SetAutofacContainer()
{
var builder = new ContainerBuilder();
builder.RegisterControllers(Assembly.GetExecutingAssembly());
builder.RegisterType<UnitOfWork>().As<IUnitOfWork>().InstancePerRequest();
builder.RegisterType<DbFactory>().As<IDbFactory>().InstancePerRequest();
// Repositories
builder.RegisterAssemblyTypes(typeof(GadgetRepository).Assembly)
.Where(t => t.Name.EndsWith("Repository"))
.AsImplementedInterfaces().InstancePerRequest();
// Services
builder.RegisterAssemblyTypes(typeof(GadgetService).Assembly)
.Where(t => t.Name.EndsWith("Service"))
.AsImplementedInterfaces().InstancePerRequest();
IContainer container = builder.Build();
DependencyResolver.SetResolver(new AutofacDependencyResolver(container));
}
}
The code itself is self explanatory. I hope you have followed along with me and you have named your repository and service classes as I did, cause otherwise, this is not gonna work. There are two importants things left to complete the tutotiral. The first one to define ViewModel classes and set Automapper to map domain entities to viewmodels and backwards. The second one is to see how to setup CSS Bootstrap in our web application. I suppose most of you, install bootstrap from Nuget Packages and start adding css and script references to your project. Here though we will follow a different approach.
CSS Bootstrap
First of all download Boostrap distribution from the official site. Add three folders to your application named css, fonts and js respectively. In the css folder paste the bootstrap.css file from what you have downloaded, in the fonts folder paste everything is inside the respective fonts folder and in the js folder, just paste the bootstrap.js file. We are going to use Bundling and Minification for bootstrap and to achieve that you need to install Microsoft ASP.NET Web Optimazation Framework through Nuget Packages.

When you finish installing this, add a new class named BundleConfig into the App_Start folder as follow:
BundleConfig.cs
public class BundleConfig
{
public static void RegisterBundles(BundleCollection bundles)
{
bundles.Add(new ScriptBundle("~/bootstrap/js").Include("~/js/bootstrap.js", "~/js/site.js"));
bundles.Add(new StyleBundle("~/bootstrap/css").Include("~/css/bootstrap.css", "~/css/site.css"));
BundleTable.EnableOptimizations = true;
}
}
As you can see I have also referenced site.js and site.css javascript and css files. Those files can host any bootstrap css customazations you wanna do or any javascript related code. Feel free to add the respective files and leave them empty. Now we need to declare that we want MVC to use bundling and minication, so add the following line into the Global.asax.cs file.
Global.asax.cs
protected void Application_Start()
{
// Init database
System.Data.Entity.Database.SetInitializer(new StoreSeedData());
AreaRegistration.RegisterAllAreas();
RouteConfig.RegisterRoutes(RouteTable.Routes);
BundleConfig.RegisterBundles(BundleTable.Bundles);
// Autofac and Automapper configurations
Bootstrapper.Run();
}
Notice that I have also called the Bootstrapper.Run() function that will setup the Autofac’s configuration we made before. This function will also configure Automapper, something we gonna see in a bit. Let’s finish with Bootrap for now. We will need a Layout to use for our application, so go and create a Shared folder under the Views folder and add a new item of type MVC 5 Layout Page (Razor) named _Layout.cshtml.
_Layout.cshtml
<!DOCTYPE html>
<html>
<head>
<meta charset="utf-8">
<meta http-equiv="X-UA-Compatible" content="IE=edge">
<meta name="viewport" content="width=device-width, initial-scale=1">
<title>@ViewBag.Title</title>
<!-- Bootstrap -->
@Styles.Render("~/bootstrap/css")
<!--[if lt IE 9]>
<script src="https://oss.maxcdn.com/libs/html5shiv/3.7.0/
html5shiv.js"></script>
<script src="https://oss.maxcdn.com/libs/respond.js/1.4.2/
respond.min.js"></script>
<![endif]-->
</head>
<body>
<nav id="myNavbar" class="navbar navbar-default navbar-inverse navbar-fixed-top" role="navigation">
<!-- Brand and toggle get grouped for better mobile display -->
<div class="navbar-header">
<button type="button" class="navbar-toggle" data-toggle="collapse" data-target="#navbarCollapse">
<span class="sr-only">Toggle navigation</span>
<span class="icon-bar"></span>
<span class="icon-bar"></span>
<span class="icon-bar"></span>
</button>
@Html.ActionLink("Store", "Index", "Home", new { }, new { @class = "navbar-brand" })
</div>
<!-- Collect the nav links, forms, and other content for toggling -->
<div class="collapse navbar-collapse" id="navbarCollapse">
<ul class="nav navbar-nav">
<li class="active">
@Html.ActionLink("Tablets", "Index", "Home", new { category = "Tablets" }, null)
</li>
<li class="active">
@Html.ActionLink("Laptops", "Index", "Home", new { category = "Laptops" }, null)
</li>
<li class="active">
@Html.ActionLink("Mobiles", "Index", "Home", new { category = "Mobiles" }, null)
</li>
</ul>
</div>
</nav>
@RenderBody()
<script src="https://ajax.googleapis.com/ajax/libs/jquery/1.11.0/jquery.min.js"></script>
@Scripts.Render("~/bootstrap/js")
</body>
</html>
The page will probably complain that cannot resolve Razor syntax so you have to add the following using statement in the web.config file which is under the Views folder (not application’s web.config). Following is part of that file..
web.config
<namespaces>
<add namespace="System.Web.Mvc" />
<add namespace="System.Web.Mvc.Ajax" />
<add namespace="System.Web.Mvc.Html" />
<add namespace="System.Web.Routing" />
<add namespace="Store.Web" />
<add namespace="System.Web.Optimization" />
</namespaces>
Automapper
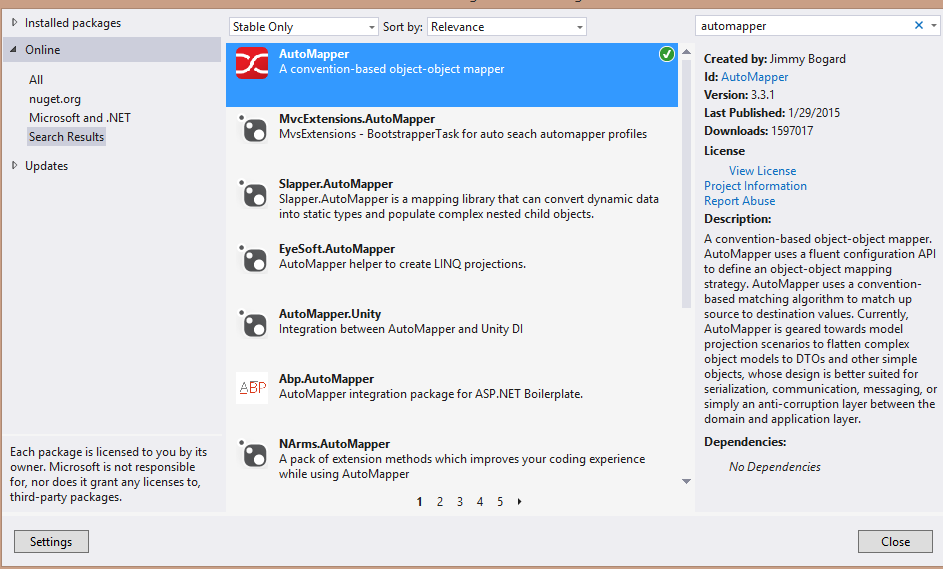
In a real application your domain objects will probably have a lot of properties but you only want to display some of them in the browser. More over when posting back to server, for example when creating objects though a form element, you also want to post only a few of the domain object’s properties. For this reason you define ViewModel objects and use them instead of the real domain ones. Make sure you install Automapper from Nuget Packages.
Add a new folder named ViewModels with the following classes.
GadgetViewModel.cs
public class GadgetViewModel
{
public int GadgetID { get; set; }
public string Name { get; set; }
public string Description { get; set; }
public decimal Price { get; set; }
public string Image { get; set; }
public int CategoryID { get; set; }
}
CategoryViewModel.cs
public class CategoryViewModel
{
public int CategoryID { get; set; }
public string Name { get; set; }
public List<GadgetViewModel> Gadgets { get; set; }
}
GadgetFormViewModel.cs
public class GadgetFormViewModel
{
public HttpPostedFileBase File { get; set; }
public string GadgetTitle { get; set; }
public string GadgetDescription { get; set; }
public decimal GadgetPrice { get; set; }
public int GadgetCategory { get; set; }
}
When your ViewModel classes have properties named as the respective domain objects, Automapper is smart enough to make the mapping through default conventions. Otherwise you have to set the mapping manualy by yourself. Notice the last class I have added, the GadgetFormViewModel. We can make a convetion to add a “Form” word before “ViewModel” so that we know that this type of view model, is posted back to server through a form element. Let’s now configure the mappings. Add a new folder Mappings and add the following class file.
AutoMapperConfiguration.cs
public class AutoMapperConfiguration
{
public static void Configure()
{
Mapper.Initialize(x =>
{
x.AddProfile<DomainToViewModelMappingProfile>();
x.AddProfile<ViewModelToDomainMappingProfile>();
});
}
}
We haven’t created the required profiles yet but we will in a bit. What I wanted to show you is that you can create as many Automapper profiles you want and then add them into Mapper.Initialize function. Here we will define two profiles, one to map domain models to ViewModels and another one for backwards. Add the following classes in the same folder as the previous.
DomainToViewModelMappingProfile.cs
public class DomainToViewModelMappingProfile : Profile
{
public override string ProfileName
{
get { return "DomainToViewModelMappings"; }
}
protected override void Configure()
{
Mapper.CreateMap<Category,CategoryViewModel>();
Mapper.CreateMap<Gadget, GadgetViewModel>();
}
}
ViewModelToDomainMappingProfile.cs
public class ViewModelToDomainMappingProfile : Profile
{
public override string ProfileName
{
get { return "ViewModelToDomainMappings"; }
}
protected override void Configure()
{
Mapper.CreateMap<GadgetFormViewModel, Gadget>()
.ForMember(g => g.Name, map => map.MapFrom(vm => vm.GadgetTitle))
.ForMember(g => g.Description, map => map.MapFrom(vm => vm.GadgetDescription))
.ForMember(g => g.Price, map => map.MapFrom(vm => vm.GadgetPrice))
.ForMember(g => g.Image, map => map.MapFrom(vm => vm.File.FileName))
.ForMember(g => g.CategoryID, map => map.MapFrom(vm => vm.GadgetCategory));
}
}
For the Domain -> ViewModels mapping we didn’t need to setup anything. Automapper will use the default conventions and that’s fine. For our GadgetFormViewModel -> Gadget mapping though, we set manually the configuration as shown above. The last thing remained to finish with Automapper is to add the following line in the Bootstrapper class.
Bootsrapper.cs
public static class Bootstrapper
{
public static void Run()
{
SetAutofacContainer();
//Configure AutoMapper
AutoMapperConfiguration.Configure();
}
// Code ommitted
Controllers and Views
We are almost finished. Add a new MVC Controller named HomeController and paste the following code.
HomeController.cs
public class HomeController : Controller
{
private readonly ICategoryService categoryService;
private readonly IGadgetService gadgetService;
public HomeController(ICategoryService categoryService, IGadgetService gadgetService)
{
this.categoryService = categoryService;
this.gadgetService = gadgetService;
}
// GET: Home
public ActionResult Index(string category = null)
{
IEnumerable<CategoryViewModel> viewModelGadgets;
IEnumerable<Category> categories;
categories = categoryService.GetCategories(category).ToList();
viewModelGadgets = Mapper.Map<IEnumerable<Category>, IEnumerable<CategoryViewModel>>(categories);
return View(viewModelGadgets);
}
}
Now you can see in action why we have made such an effort to setup Repositories, Services, Autofac and Automapper. Services will be injected in the controller for each request and their data will be mapped to ViewModels before send to the Client. Right click in the Index action and add a View named Index with the following code. I must mention here, that the gadgets objects we use, have image references to a folder named images in the Web Application project. You can use your images or just download this project at the end of this post.
Views/Home/Index.cshtml
@model IEnumerable<Store.Web.ViewModels.CategoryViewModel>
@{
ViewBag.Title = "Store";
Layout = "~/Views/Shared/_Layout.cshtml";
}
<p>
</p>
<div class="container">
<div class="jumbotron">
@foreach (var item in Model)
{
<div class="panel panel-default">
<div class="panel-heading">
@*@Html.DisplayFor(modelItem => item.Name)*@
@Html.ActionLink("View all " + item.Name, "Index", new { category = item.Name }, new { @class = "pull-right" })
@using (Html.BeginForm("Filter", "Home", new { category = item.Name }, FormMethod.Post, new { @class = "navbar-form" }))
{
@Html.TextBox("gadgetName", null, new { @class = "form-control", placeholder = "Search in " + item.Name })
}
</div>
@foreach (var gadget in item.Gadgets)
{
@Html.Partial("Gadget", gadget)
}
<div class="panel-footer">
@using (Html.BeginForm("Create", "Home", FormMethod.Post,
new { enctype = "multipart/form-data", @class = "form-inline" }))
{
@Html.Hidden("GadgetCategory", item.CategoryID)
<div class="form-group">
<label class="sr-only" for="file">File</label>
<input type="file" class="form-control" name="file" placeholder="Select picture..">
</div>
<div class="form-group">
<label class="sr-only" for="gadgetTitle">Title</label>
<input type="text" class="form-control" name="gadgetTitle" placeholder="Title">
</div>
<div class="form-group">
<label class="sr-only" for="gadgetName">Price</label>
<input type="number" class="form-control" name="gadgetPrice" placeholder="Price">
</div>
<div class="form-group">
<label class="sr-only" for="gadgetName">Description</label>
<input type="text" class="form-control" name="gadgetDescription" placeholder="Description">
</div>
<button type="submit" class="btn btn-primary">Upload</button>
}
</div>
</div>
}
</div>
</div>
Two things to notice here. The first one is that we need to create a Partial view to diplay a GadgetViewModel object and the second one is the Form’s control element’s names. You can see that they much our GadgetFormViewModel properties. Under the Shared folder create the following Partial view for displaying a GadgetViewModel object.
Views/Shared/Gadget.cshtml

In the Index.cshtml page I have added search and filter functionality and Create gadget as well. To achieve that you need to add the following Action methods to the HomeController.
HomeController.cs
public ActionResult Filter(string category, string gadgetName)
{
IEnumerable<GadgetViewModel> viewModelGadgets;
IEnumerable<Gadget> gadgets;
gadgets = gadgetService.GetCategoryGadgets(category, gadgetName);
viewModelGadgets = Mapper.Map<IEnumerable<Gadget>, IEnumerable<GadgetViewModel>>(gadgets);
return View(viewModelGadgets);
}
[HttpPost]
public ActionResult Create(GadgetFormViewModel newGadget)
{
if (newGadget != null && newGadget.File != null)
{
var gadget = Mapper.Map<GadgetFormViewModel, Gadget>(newGadget);
gadgetService.CreateGadget(gadget);
string gadgetPicture = System.IO.Path.GetFileName(newGadget.File.FileName);
string path = System.IO.Path.Combine(Server.MapPath("~/images/"), gadgetPicture);
newGadget.File.SaveAs(path);
gadgetService.SaveGadget();
}
var category = categoryService.GetCategory(newGadget.GadgetCategory);
return RedirectToAction("Index", new { category = category.Name });
}
I am sure that at this point you understand the purpose of all the above code so I won’t explain anything. You need to add a Filter page so right click in the Filter action and create the following View.
Home/Views/Filter.cshtml
@model IEnumerable<Store.Web.ViewModels.GadgetViewModel>
@{
ViewBag.Title = "Filter";
Layout = "~/Views/Shared/_Layout.cshtml";
}
<div class="container">
<div class="jumbotron">
@foreach (var item in Model)
{
<div class="panel panel-default">
<div class="panel-heading">
@Html.Label(item.Name)
</div>
@Html.Partial("Gadget", item)
</div>
}
</div>
</div>

You can filter gadgets by category or search gadgets in a specific category. That’s it, we have finished creating a highly decoupled architecture that could support large scale MVC applications.
Github
I have decided to move all of my code to my Github account so you can download most of the projects that we have seen on this blog from there. You can download this project from here. I hope you enjoyed this post as much as I did. Don’t forget to get subscribed in case you don’t want to miss any upcoming post.
| Reference: | ASP.NET MVC Solution Architecture – Best Practices from our NCG partner Christos Sakellarios at the chsakell’s Blog blog. |
Great Going!!! Keep on sharing knowledge!