Windows Communication Foundation is a great framework for building highly secure and reliable services that can integrate across different platforms. One of its great features is that it provides SOAP tooling for automatically creating proxy classes-clients to consume the services. When I say tooling I mean the well known Add Service Reference.. option or the Web Services Description Language Tool (wsdl.exe) that can generate proxy classes. In fact, this is one of the main reasons many developers and architects choose WCF as the base of their Service Oriented Applications. With just one click and no other effort at all, you have the .NET clients ready to be used and consume WCF services. Unfortunately, less developers are aware that proxy clients can be manually (and easily) created giving the opportunity to have full control upon them. This post will show you different ways to create and use that kind of proxies in order to consume your WCF services. Let’s see what we ‘re gonna see in detail:
- Create and host WCF services: Create a simple WCF service which will be self-hosted in a WPF application.
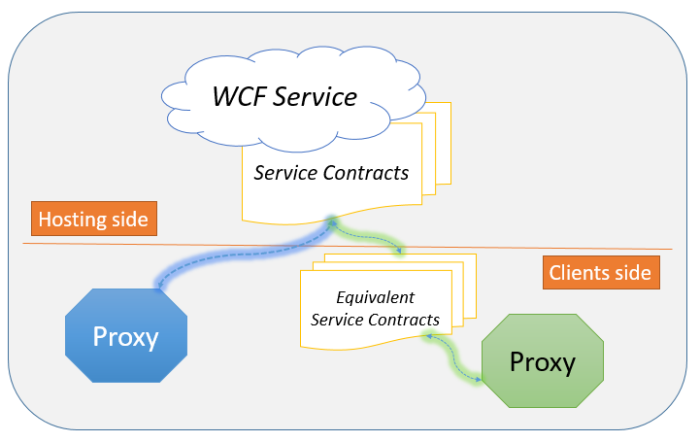
- Shared-contract Proxies: Create WCF proxies using a shared WCF Service Contract
- External Proxies: Create WCF proxies using equivalent Service Contracts with the hosted WCF service
- Proxy creation methods: Describe how to use ClientBase<T> and ChannelFactory<T> to create WCF proxies
- Dependency Injection: Proxy injection and deterministic disposal using Autofac IoC Container
Some basic WCF knowledge is required to follow along this tutorial but not required. Ready? Let’s start!
Create and host WCF services
Open Visual Studio and create a black solution named WcfProxies. First thing we ‘ll do is create the basic data infrastructure for our application. Add a new class library project named WcfProxies.Data in the solution and create a folder named Entities inside it. We ‘ll try to keep things simple as far as data concerns, so that we can focus more on WCF related stuff. Add the following three classes inside the Entities folder you have just created.
IEntity.cs
public interface IEntity
    {
        int ID { get; set; }
    }
Post.cs
public class Post : IEntity
    {
        public int PostId { get; set; }
        public string Title { get; set; }
        public string Author { get; set; }
        public DateTime DateCreated { get; set; }
        public string URI { get; set; }

        public int BlogId { get; set; }

        public int ID
        {
            get { return PostId; }
            set { PostId = value; }
        }
    }
Blog.cs
public class Blog : IEntity
    {
        public Blog()
        {
            Posts = new List<Post>();
        }
        public int BlogId { get; set; }
        public string Name { get; set; }
        public string URI { get; set; }
        public string Owner { get; set; }
        public List<Post> Posts { get; set; }
        public int ID
        {
            get { return BlogId; }
            set { BlogId = value; }
        }
    }
We want to enhance Dependency Injection through our application so let’s create an interface that holds the method signatures for retrieving data of type Post and Blog. Add a new folder named Repositories in the same project and create the following files as follow:
IBlogPostRepository.cs
public interface IBlogPostRepository
    {
        Post GetPost(int postId);
        Blog GetBlog(int blogId);
        List<Post> GetBlogPosts(int blogId);
    }
BlogPostRepository.cs
public class BlogPostRepository : IBlogPostRepository
    {
        public Post GetPost(int postId)
        {
            Post _post = null;

            Blog _blog = _blogs.FirstOrDefault(b => b.Posts.Any(p => p.ID == postId));
            if (_blog != null)
                _post = _blog.Posts.First(p => p.ID == postId);

            return _post;
        }

        public List<Post> GetBlogPosts(int blogId)
        {
            List<Post> _posts = null;

            Blog _blog = _blogs.FirstOrDefault(b => b.ID == blogId);
            if (_blog != null)
            {
                _posts = new List<Post>();
                foreach (var post in _blog.Posts)
                    _posts.Add(post);
            }

            return _posts;
        }

        public Blog GetBlog(int blogId)
        {
            return _blogs.FirstOrDefault(b => b.ID == blogId);
        }

        static List<Blog> _blogs = new List<Blog>()
        {
            new Blog()
            {
                BlogId = 1,
                Name = "chsakell's Blog",
                Owner = "Chris S.",
                URI = "http://chsakell.com/",
                Posts = new List<Post>()
                {
                    new Post() {
                        PostId = 1,
                        Author = "Chris S.",
                        DateCreated = DateTime.Now.AddDays(-5),
                        Title = "Building SPA using Web API & angularJS",
                        BlogId = 1,
                        URI = "http://wp.me/p3mRWu-PT"
                    },
                    new Post() {
                        PostId = 2,
                        Author = "Chris S.",
                        DateCreated = DateTime.Now.AddDays(-10),
                        Title = "WCF Security using encrypted tokens",
                        BlogId = 2,
                        URI ="http://wp.me/p3mRWu-CI"
                    }
                }
            },
            new Blog()
            {
                BlogId = 2,
                Name = "DotNetCodeGeeks",
                Owner = ".NET Community",
                URI = "http://www.dotnetcodegeeks.com/",
                Posts = new List<Post>()
                {
                    new Post() {
                        PostId = 3,
                        Author = "Chris S.",
                        DateCreated = DateTime.Now.AddMonths(-2),
                        Title = "TypeScript, AngularJS, Gulp and Bower in Visual Studio 2015",
                        BlogId = 2,
                        URI = "http://www.dotnetcodegeeks.com/2015/09/typescript-angularjs-gulp-and-bower-in-visual-studio-2015.html"
                    },
                    new Post() {
                        PostId = 4,
                        Author = "Chris S.",
                        DateCreated = DateTime.Now.AddMonths(-2),
                        Title = "Dependency injection in WCF",
                        BlogId = 2,
                        URI = "http://www.dotnetcodegeeks.com/2015/08/dependency-injection-in-wcf.html"
                    },
                    new Post() {
                        PostId = 5,
                        Author = "Chris S.",
                        DateCreated = DateTime.Now.AddMonths(-2),
                        Title = "ASP.NET Web API feat. OData",
                        BlogId = 2,
                        URI = "http://www.dotnetcodegeeks.com/2015/06/asp-net-web-api-feat-odata.html"
                    }
                }
            },
        };
    }
To keep things as much as simple as possible, we will use a static list of Blog items when requesting data from WCF Services.
WCF Contracts
Let’s proceed with the WCF Contracts. Add a new class library project named WcfProxies.Contracts in the solution. Make sure you add references to System.ServiceModel and System.Runtime.Serialization assemblies. These two core assemblies are more than enough to create and host WCF services. From now on, you have to add references to these assemblies to any project we will create later on this tutorial. The WcfProxies.Contracts project is very important to our application for two reasons. Firstly, it will hold the WCF Data and Service contracts as well for the WCF Services. Secondly, this is the library that will be used by the shared contract Proxies that we will create later. Add a folder named Data in the new project and create the following Data contract.
PostData.cs
[DataContract]
    public class PostData
    {
        [DataMember]
        public string Title { get; set; }
        [DataMember]
        public string Author { get; set; }
        [DataMember]
        public string URI { get; set; }
        [DataMember]
        public string Blog { get; set; }
    }
Data Contracts describe the shape of the data being exchanged via WCF services or in other words, the type of the incoming and returned data to and from the WCF services respectively. In order to make a class serializable, you need to decorate it with the attribute [DataContract]. Later, you decorate any public property you want to be serialized with the attribute [DataMember]. Mind that from the .NET 4.0 and later, if you leave those attributes any public member of the class becomes automatically serializable.
Let’s create the Service Contract now. Add a new folder named Services and create the following class.
IBlogPostService.cs
[ServiceContract]
    public interface IBlogPostService
    {
        [OperationContract]
        PostData GetPost(int postId);

        [OperationContract]
        IEnumerable<PostData> GetBlogPosts(int blogId);
    }
A Service Contract describes the operations available in a WCF service. It is simply an interface decorated with the attribute [ServiceContract] and all of its members (methods) that needs to be implemented by the WCF service, decorated with the [OperationContract]. In our example, we have only two operation contracts. One to search for a specific post among all blogs and another to retrieve all posts belonging to a specific blog. And by post I mean the post related data in the form of the Data contract PostData we previously created.
WCF Service
Let’s create the implementation class for the service contract. Add a new class library project named WcfProxies.Services and make sure you add the WCF required assemblies System.ServiceModel and System.Runtime.Serialization. This project also needs references to the WcfProxies.Data and WcfProxies.Contracts projects as well, so go ahead and add them. Most developers are used to name the service contract in a form of IServiceContractName following with the implementation name in the form of ServiceContractName so you would expect here to name the implementation of the IBlogPostService interface BlogPostService. I have never found this useful, especially when hosting services via configuration. Instead, I will name the implementation WCF service BlogPostController which actually denotes exactly that this is where all the logic and processing happens in our WCF Service (I’m pretty sure Web API developers will love this naming convention..). Add the BlogPostController in the new project you have just created.
BlogPostController.cs
public class BlogPostController : IBlogPostService
    {
        IBlogPostRepository _blogPostRepository;

        public BlogPostController(IBlogPostRepository blogPostRepository)
        {
            this._blogPostRepository = blogPostRepository;
        }

        public PostData GetPost(int postId)
        {
            PostData _post = null;
            Post _postEntity = _blogPostRepository.GetPost(postId);

            if (_postEntity != null)
            {
                Blog _blog = _blogPostRepository.GetBlog(_postEntity.BlogId);
                _post = new PostData()
                {
                    Title = _postEntity.Title,
                    Author = _postEntity.Author,
                    URI = _postEntity.URI,
                    Blog = _blog.Name
                };
            }

            return _post;
        }

        public IEnumerable<PostData> GetBlogPosts(int blogId)
        {
            List<PostData> _posts = null;
            List<Post> _postEntities = _blogPostRepository.GetBlogPosts(blogId);

            if (_postEntities != null)
            {
                _posts = new List<PostData>();
                foreach (var post in _postEntities)
                {
                    Blog _blog = _blogPostRepository.GetBlog(post.BlogId);
                    _posts.Add(new PostData()
                    {
                        Title = post.Title,
                        Author = post.Author,
                        URI = post.URI,
                        Blog = _blog.Name
                    });
                }
            }

            return _posts;
        }
    }
As you can see, an instance of IBlogPostRepository will be automatically injected in to the service controller. We will configure it right away when we create the WPF hosting application.
Self-host WCF Service
Add a new WPF Application project named WcfProxies.WindowsHost in the solution and make sure you add references to System.ServiceModel and System.Runtime.Serialization assemblies. You also need to reference the WcfProxies.Data, WcfProxies.Contracts and WcfProxies.Services projects as well. If you are not familiar with WPF that’s OK, the from will only hold two buttons to start and stop the WCF Service. Change the MainWindow.xaml code as follow (create it if not exists..).
MainWindow.xaml
<Window x:Class="WcfProxies.WindowsHost.MainWindow"
        xmlns="http://schemas.microsoft.com/winfx/2006/xaml/presentation"
        xmlns:x="http://schemas.microsoft.com/winfx/2006/xaml"
        xmlns:d="http://schemas.microsoft.com/expression/blend/2008"
        xmlns:mc="http://schemas.openxmlformats.org/markup-compatibility/2006"
        xmlns:local="clr-namespace:WcfProxies.WindowsHost"
        mc:Ignorable="d"
        Title="MainWindow" Height="350" Width="525">
    <Grid>
        <Button x:Name="btnStartService" Content="Start Service" HorizontalAlignment="Left" Margin="72,32,0,0" VerticalAlignment="Top" Width="379" Height="57" FontSize="32" Click="btnStartService_Click"/>
        <Button x:Name="btnStopService" Content="Stop Service" HorizontalAlignment="Left" Margin="72,125,0,0" VerticalAlignment="Top" Width="379" Height="57" FontSize="32" Click="btnStopService_Click" IsEnabled="False"/>
        <Label x:Name="lblStatus" Content="Service is stopped." HorizontalAlignment="Left" Margin="71,227,0,0" VerticalAlignment="Top" FontSize="26.667" Foreground="#FFD12323"/>

    </Grid>
</Window>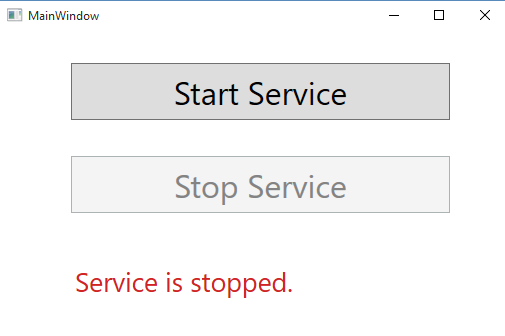
Before setting the button events we need to install the Autofac.Wcf integration package in order to set the IoC Container and configure the dependency injection. Install it via Nuget Package Manager by searching the term Autofac.Wcf. Switch to the MainWindow.xaml.cs code behind file and set the IoC Container as follow. We will write the button events code later.
MainWindow.xaml.cs
public partial class MainWindow : Window
    {
        ServiceHost _host = null;
        ContainerBuilder builder = null;
        IContainer container = null;

        public MainWindow()
        {
            InitializeComponent();

            // Init Autofac.WCF container
            builder = new ContainerBuilder();
            builder.RegisterType<BlogPostController>()
                    .As<IBlogPostService>();
            builder.RegisterType<BlogPostRepository>()
                    .As<IBlogPostRepository>();

            container = builder.Build();
        }

        private void btnStartService_Click(object sender, RoutedEventArgs e)
        {
            // Nothing at the moment..
        }

        private void btnStopService_Click(object sender, RoutedEventArgs e)
        {
            // Nothing at the moment..
        }
    }
With this configuration when a request to WCF service arrives, an instance of BlogPostRepository will be injected directly to the BlogPostController constructor. Before writing the Start & Stop button events we need to declare what type of service we want to host in the App.config configuration file (create it if not exists). More over, we will define the way clients can consume or talk to this service which means what kind of bindings does the WCF service use.
App.config
<?xml version="1.0" encoding="utf-8" ?>
<configuration>
  <startup>
    <supportedRuntime version="v4.0" sku=".NETFramework,Version=v4.5.1" />
  </startup>
  <system.serviceModel>
    <services>
      <service name="WcfProxies.Services.BlogPostController">
        <endpoint address="net.tcp://localhost:9001/BlogPostService"
                  binding="netTcpBinding"
                  contract="WcfProxies.Contracts.Services.IBlogPostService"/>
        <endpoint address="http://localhost:9002/BlogPostService"
                  binding="wsHttpBinding"
                  contract="WcfProxies.Contracts.Services.IBlogPostService"/>
      </service>
    </services>
  </system.serviceModel>
</configuration>
For each service you want to host you need to define a service element with a name attribute equal to the fully qualified type of the service. In the same way the service element stands on the top of a service layer, an endpoint element stands in the service contract layer. So if a WCF service implements 3 different service contracts, you can define each of those contracts to be hosted in a different address, by declaring the respective endpoint. In our case we only have one service contract, the IBlogPostService and we want it to be consumed under two different transport mechanisms and addresses. This service will listen tcp requests at net.tcp://localhost:9001/BlogPostService and http requests at http://localhost:9002/BlogPostService. Now you can see how the naming convention we made for the WCF service helped. Time to view the Start & Stop events code.
part of MainWindow.xaml.cs
private void btnStartService_Click(object sender, RoutedEventArgs e)
{
try
{
_host = new ServiceHost(typeof(BlogPostController));
// add using statement: using Autofac.Integration.Wcf;
_host.AddDependencyInjectionBehavior<IBlogPostService>(container);
_host.Open();
this.btnStopService.IsEnabled = true;
this.btnStartService.IsEnabled = false;
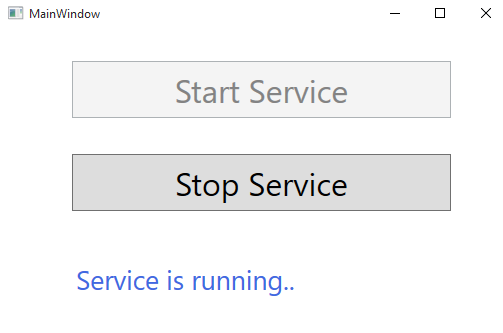
this.lblStatus.Content = "Service is running..";
this.lblStatus.Foreground = new SolidColorBrush(Colors.RoyalBlue);
}
catch (Exception ex)
{
container.Dispose();
MessageBox.Show(ex.Message);
}
}
private void btnStopService_Click(object sender, RoutedEventArgs e)
{
try
{
_host.Close();
this.btnStopService.IsEnabled = false;
this.btnStartService.IsEnabled = true;
this.lblStatus.Content = "Service is stopped.";
this.lblStatus.Foreground = new SolidColorBrush(Colors.Crimson);
}
catch (Exception ex)
{
container.Dispose();
MessageBox.Show(ex.Message);
}
}Run the WcfProxies.WindowsHost application as administrator and click the Start button. If prompted to allow access through Windows Firewall click OK. At this moment you should be able to host the WCF service in two different endpoints.
Finally, it’s time for the esense of this post, create the WCF Proxies!
Shared-contract Proxies
So what exactly is a WCF Proxy anyway? A WCF Proxy is a powerful object capable to communicate with WCF Services which means it can manage all the low level core operations required to establish a connection to a WCF Service. Which are these operations? Let’s take a look at the most important of them.
- Handshaking and communication channel parameters setting for establishing a normal communication between the client and the hosting service.
- Security conformance that is accept and apply all the security parameters required by the hosted WCF Service in order to be consumed
- Valid message transmission that is transmitting messages in the protocol(s) defined and supported by the hosted WCF service
If you were to write all this low level code by yourself then good luck with it, it ‘ll take like ages to make a single WCF call. A WCF Proxy needs to know two more things other than establishing a proper, reliable and secure connection with a WCF service. It needs to know what is out there meaning what operations are available and the shape of the data being exchanged. In other words it needs to know the Data and Service contracts. Now, what if I told you that there is a specific abstract generic class inside the System.ServiceModel assembly that can manage all the pre-mentioned low level stuff for you? And more over, what if the generic type parameter was (accidentally) a type of service contract? Then all of our problems would be magically solved right? Yup, that’s the answer.
Add a new class library project named WcfProxies.Proxies inside the solution and add references to System.ServiceModel and System.Runtime.Serialization assemblies. You need to reference the WcfProxies.Data and the WcfProxies.Contracts projects as well. The WcfProxies.Contracts project will actually hold the shared contracts for the Proxy class we will create right away. Add a folder named Shared inside the new project and create the following class.
BlogPostClient.cs
public class BlogPostClient : ClientBase<IBlogPostService>, IBlogPostService
    {
        public BlogPostClient(string endpoint)
            : base(endpoint)
        { }

        public BlogPostClient(Binding binding, EndpointAddress address)
            : base(binding, address)
        { }
        public IEnumerable<PostData> GetBlogPosts(int blogId)
        {
            return Channel.GetBlogPosts(blogId);
        }

        public PostData GetPost(int postId)
        {
            return Channel.GetPost(postId);
        }
    }
So the abstract class we were talking about is the ClientBase<T> and here the generic type parameter is a type of IBlogPostService. Mind that since the ClientBase<T> class is per service contract you need to create a proxy class per service contract. We set the wrapper class BlogPostClient inherit the ClientBase<IBlogPostService> and also implement the IBlogPostService interface. Note that this interface is the same service contract we used to host the WCF service and hence the Shared-contract proxy. As you may have noticed, you can access the operation’s methods through the ClientBase<T> Channel property. I have also declared two constructors for the wrapper client that invokes the base respective constructors. Let’s use this client, shall we?
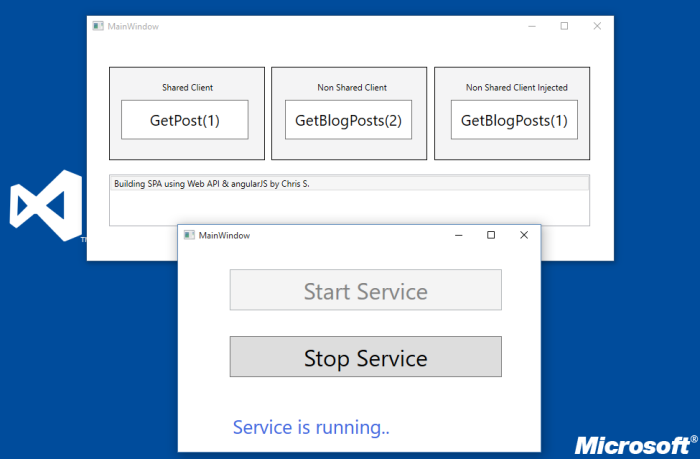
Add a new WPF project named WcfProxies.Clients in the solution and add references to System.ServiceModel and System.Runtime.Serialization assemblies. You also need to reference the WcfProxies.Data, WcfProxies.Contracts and WcfProxies.Proxies projects. Change the MainWindow.xaml (create a WPF window named MainWindow if not exists) contents as follow.
WcfProxies.Clients/MainWindow.xaml
<Window x:Class="WcfProxies.Clients.MainWindow"
        xmlns="http://schemas.microsoft.com/winfx/2006/xaml/presentation"
        xmlns:x="http://schemas.microsoft.com/winfx/2006/xaml"
        xmlns:d="http://schemas.microsoft.com/expression/blend/2008"
        xmlns:mc="http://schemas.openxmlformats.org/markup-compatibility/2006"
        xmlns:local="clr-namespace:WcfProxies.Clients"
        mc:Ignorable="d"
        Title="MainWindow" Height="350" Width="740">
    <Grid>
        <Rectangle Fill="#FFF4F4F5" HorizontalAlignment="Left" Height="130" Margin="31,41,0,0" Stroke="Black" VerticalAlignment="Top" Width="217"/>
        <Rectangle Fill="#FFF4F4F5" HorizontalAlignment="Left" Height="130" Margin="257,41,0,0" Stroke="Black" VerticalAlignment="Top" Width="217"/>
        <Button x:Name="btnSharedClient" Content="GetPost(1)" HorizontalAlignment="Left" Margin="48,87,0,0" VerticalAlignment="Top" Width="177" Height="55" FontSize="21.333" Click="btnSharedClient_Click" Background="White"/>
        <Button x:Name="btnNonSharedClient" Content="GetBlogPosts(2)" HorizontalAlignment="Left" Margin="276,87,0,0" VerticalAlignment="Top" Width="177" Height="55" FontSize="21.333" Click="btnNonSharedClient_Click" Background="White"/>
        <Label x:Name="labelShared" Content="Shared Client" HorizontalAlignment="Left" Margin="100,56,0,0" VerticalAlignment="Top" RenderTransformOrigin="0.622,-0.497"/>
        <Label x:Name="labelNonShared" Content="Non Shared Client" HorizontalAlignment="Left" Margin="316,56,0,0" VerticalAlignment="Top" RenderTransformOrigin="0.622,-0.497"/>
        <ListBox x:Name="lbxResult" HorizontalAlignment="Left" Height="72" Margin="31,191,0,0" VerticalAlignment="Top" Width="670"/>
        <Rectangle Fill="#FFF4F4F5" HorizontalAlignment="Left" Height="130" Margin="484,41,0,0" Stroke="Black" VerticalAlignment="Top" Width="217"/>
        <Label x:Name="labelNonShared_Copy" Content="Non Shared Client Injected" HorizontalAlignment="Left" Margin="523,56,0,0" VerticalAlignment="Top" RenderTransformOrigin="0.622,-0.497"/>
        <Button x:Name="btnNonSharedClientInjected" Content="GetBlogPosts(1)" HorizontalAlignment="Left" Margin="507,87,0,0" VerticalAlignment="Top" Width="177" Height="55" FontSize="21.333" Click="btnNonSharedClientInjected_Click" Background="White"/>

    </Grid>
</Window>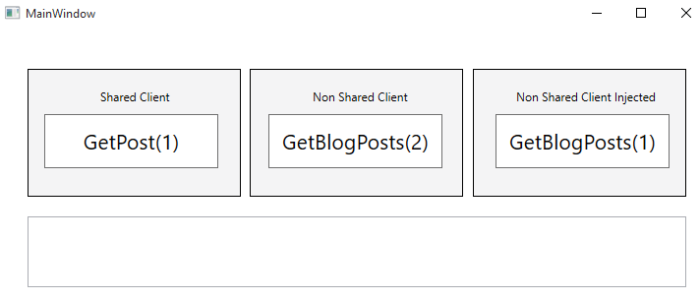
Before setting the shared client‘s button event, we need to configure the WCF proxy. In WCF you can configure services and clients in two ways, either using a configuration file (Web.config or App.config) using a <system.serviceModel> element or programmatically. If you recall, the proxy class we created had two constructors, one that accepts an endpoint’s name and another that accepts a Binding and a EndpointAddress object.
part of BlogPostClient
public BlogPostClient(string endpoint)
            : base(endpoint)
        { }

        public BlogPostClient(Binding binding, EndpointAddress address)
            : base(binding, address)
        { }
The first constructor uses WCF configuration set in a config file while the second one set the proxy configuration programmatically so as you realize, we will have the opportunity to view both techniques in practice. Change the App.config in the WcfProxies.Clients project as follow:
App.config
<?xml version="1.0" encoding="utf-8" ?>
<configuration>
    <startup>
        <supportedRuntime version="v4.0" sku=".NETFramework,Version=v4.5.1" />
    </startup>
  <system.serviceModel>
    <client>
      <endpoint address="net.tcp://localhost:9001/BlogPostService"
                binding="netTcpBinding"
                contract="WcfProxies.Contracts.Services.IBlogPostService"
                name="tcp"/>
      <endpoint address="http://localhost:9002/BlogPostService"
                binding="wsHttpBinding"
                contract="WcfProxies.Contracts.Services.IBlogPostService"
                name="ws"/>
    </client>
  </system.serviceModel>
</configuration>
The service configuration of a WCF client’s side is almost identical with the configuration in the hosting side. Instead of a service element you define a client element for each service you want the proxy to consume. Of course the client doesn’t have a clue about the actual service implementation and hence you wont see any reference to it or any definition in the configuration. It has though knowledge of the service contracts. We declared almost the same endpoints with the slight difference that we have also gave them a name. Guess what, that’s the name for the constructor that accepts an endpoint’s name to start invoking a WCF service. Switch to the code behind file in MainWindows.xaml.cs and set the as follow:
btnSharedClient_Click event
private void btnSharedClient_Click(object sender, RoutedEventArgs e)
        {
            try
            {
                // Instance per endpoint name
                BlogPostClient sharedProxy = new BlogPostClient("tcp");

                PostData _firstPost = sharedProxy.GetPost(1);

                if (_firstPost != null)
                {
                    lbxResult.Items.Clear();
                    lbxResult.Items.Add(_firstPost.Title + " by " + _firstPost.Author);
                }

                sharedProxy.Close();
            }
            catch (Exception ex)
            {
                MessageBox.Show(ex.Message);
            }
        }
This client is going to consume the WCF hosted service via a TCP connection due to the endpoint’s name used on the proxy’s constructor. The information will be read from the respective endpoint inside the App.config WCF configuration. Fire the hosting application, click the Start button and then run the client application. Click the share client button and confirm that all works as expected.
Assuming you wanted to try the alternate technique and configure the client programmatically just simply change the button’s event as follow:
btnSharedClient_Click event (programmatically)
private void btnSharedClient_Click(object sender, RoutedEventArgs e)
        {
            try
            {
                EndpointAddress address = new EndpointAddress("http://localhost:9002/BlogPostService");
                Binding binding = new WSHttpBinding();
                BlogPostClient sharedProxy = new BlogPostClient(binding, address);

                PostData _firstPost = sharedProxy.GetPost(1);

                if (_firstPost != null)
                {
                    lbxResult.Items.Clear();
                    lbxResult.Items.Add(_firstPost.Title + " by " + _firstPost.Author);
                }

                sharedProxy.Close();
            }
            catch (Exception ex)
            {
                MessageBox.Show(ex.Message);
            }
        }
Here on purpose, not only we set the proxy in code, we also configure it to access the WCF service via http using the wsHttpBinding.
External Proxies
The method we have just described assumes that the client application exist in the same solution since client and host share the same service contract. This isn’t though always the case. There might be architectures that clients are outside of the hosting application or even worst the client application doesn’t even belong in the same company that builds and hosts the service. The question now is what does the external proxy require to know or what is the minimum information you need to share with the people on the other side in order to build the proxy and consume the WCF service? The answer is pretty much the same since all a proxy needs to consume a WCF service is the endpoints information. But there’s a small problem here, the other side doesn’t have direct access to your WcfProxies.Contracts assembly and hence cannot use it to create the proxy. Fortunately, this can be resolved through equivalent service contracts. So when two service contracts are equivalent?
Equivalent service contracts
- Service contract names match
- Operation contract names match
- Namespaces match
Let’s simulate the case. Switch to the WcfProxies.Proxies project again and create a folder named External. Create the following service and data contracts in a IBlogPostService.cs file.
External/IBlogPostService.cs
namespace WcfProxies.Proxies.External
{
    [ServiceContract]
    public interface IBlogPostService
    {
        [OperationContract]
        PostData GetPost(int postId);

        [OperationContract]
        IEnumerable<PostData> GetBlogPosts(int blogId);
    }

    [DataContract]
    public class PostData
    {
        [DataMember]
        public string Title { get; set; }
        [DataMember]
        public string Author { get; set; }
        [DataMember]
        public string URI { get; set; }
        [DataMember]
        public string Blog { get; set; }
    }
}
As you can see the contracts are identical to those exist in the WcfProxies.Contracts but they certainly doesn’t share any code and certainly have different namespaces (we ‘ll discuss this later), so we can safely say that this could have been coded in an entire different application. As I have already mentioned, I wanted to see two methods for creating proxy classes. We saw the one using the ClientBase<T>, now it’s time to describe the one with the ChannelFactory<T>. Switch to the WcfProxies.Clients project and set the second’s button event (btnNonSharedClient_Click) as follow:
btnNonSharedClient_Click
private void btnNonSharedClient_Click(object sender, RoutedEventArgs e)
        {
            IEnumerable<WcfProxies.Proxies.External.PostData> _posts = null;

            try
            {
                ChannelFactory<WcfProxies.Proxies.External.IBlogPostService> factory
                    = new ChannelFactory<WcfProxies.Proxies.External.IBlogPostService>("tcpExt");

                //EndpointAddress address = new EndpointAddress("http://localhost:9002/BlogPostService");
                //Binding binding = new WSHttpBinding();
                //ChannelFactory<WcfProxies.Proxies.External.IBlogPostService> factory
                //    = new ChannelFactory<WcfProxies.Proxies.External.IBlogPostService>(binding, address);

                WcfProxies.Proxies.External.IBlogPostService _externalProxy = factory.CreateChannel();
                _posts = _externalProxy.GetBlogPosts(2);

                if (_posts != null)
                {
                    lbxResult.Items.Clear();
                    foreach (var post in _posts)
                    {
                        lbxResult.Items.Add(post.Title + " by " + post.Author);
                    }

                    factory.Close();
                }
            }
            catch (Exception ex)
            {
                MessageBox.Show(ex.Message);
            }
        }
First of all notice that i have intentionally used the full qualified name of the external service and data contracts, so that we assure to simulate the non-shared proxy case. The generic ChannelFactory<T> of type WcfProxies.Proxies.External.IBlogPostService returns an ClientBase implementation of the WcfProxies.Proxies.External.IBlogPostService service contract, in other words.. a proxy! It supports both the constructors we used in the shared case and in the example I used the one that reads the configuration from the config file. I used a tcpExt name so we have to declare it in the App.config file as well.
App.config
<?xml version="1.0" encoding="utf-8" ?>
<configuration>
    <startup>
        <supportedRuntime version="v4.0" sku=".NETFramework,Version=v4.5.1" />
    </startup>
  <system.serviceModel>
    <client>
      <endpoint address="net.tcp://localhost:9001/BlogPostService"
                binding="netTcpBinding"
                contract="WcfProxies.Contracts.Services.IBlogPostService"
                name="tcp"/>
      <endpoint address="http://localhost:9002/BlogPostService"
                binding="wsHttpBinding"
                contract="WcfProxies.Contracts.Services.IBlogPostService"
                name="ws"/>
      <endpoint address="net.tcp://localhost:9001/BlogPostService"
                binding="netTcpBinding"
                contract="WcfProxies.Proxies.External.IBlogPostService"
                name="tcpExt"/>
    </client>
  </system.serviceModel>
</configuration>
Fire the hosting and client applications and try to click the Non Shared Client button. You will notice that you won’t get anything back. Why? Cause not all the required conditions for contract equivalency are met. We are missing the namespace matching and to solve this we have two options. The first one is to assign the same Namespace attribute to all of the Service and Data contracts as follow:
[ServiceContract(Namespace = "http://www.chsakell.com/wcfproxies")]
public interface IBlogPostService
// Code omitted
[DataContract(Namespace = "http://www.chsakell.com/wcfproxies")]
public class PostData
// Code omitted
This must be done both in the WcfProxies.Contracts and the WcfProxies.Proxies projects in both service and data contracts. Go ahead changed them, and try again the previous test. This time the proxy will be able to consume properly the WCF service. The second option which will allow you not to pollute your contracts with attributes is to set a the required mapping between the CLR namespaces and the Contract namespaces inside the Assemblyinfo.cs file for both the WcfProxies.Proxies and WcfProxies.Contracts projects. Add the following line of code at the end of the Assemblyinfo.cs file in the WcfProxies.Proxies project.
[assembly: ContractNamespace("http://www.chsakell.com/wcfproxies",
    ClrNamespace = "WcfProxies.Proxies.External")]
Add the following line at the same file but this time in the WcfProxies.Contracts project.
[assembly: ContractNamespace("http://www.chsakell.com/wcfproxies",
    ClrNamespace = "WcfProxies.Contracts.Data")]
[assembly: ContractNamespace("http://www.chsakell.com/wcfproxies",
    ClrNamespace = "WcfProxies.Contracts.Services")]
Since in this project we used different CLR namespace for the Data and the Service contract, we needed two ContractNamespace attribute declarations. If you decide to go with this method, make sure you do it in both projects and also remove the Namespace attribute from all the contracts in both sides.
Dependency Injection
The last thing I want you to show is how to inject proxies and automatically free resources consumed by them. In order to accomplish it we need to install the Autofac.Wcf integration package as we did in the hosting application, so go ahead and install it via Nuget Package Manager in the WcfProxies.Clients project. Then, create the following wrapper class inside the WcfProxies.Proxies project in the External folder.
External/BlogPostClientExt.cs
public class BlogPostClientExt
    {
        readonly WcfProxies.Proxies.External.IBlogPostService _blogPostService;

        public BlogPostClientExt(IBlogPostService blogPostService)
        {
            this._blogPostService = blogPostService;
        }

        public PostData GetPost(int postId)
        {
            return _blogPostService.GetPost(postId);
        }

        public IEnumerable<PostData> GetBlogPosts(int blogId)
        {
            return _blogPostService.GetBlogPosts(blogId);
        }
    }
Switch to the MainWindow.xaml.cs file in the WcfProxies.Clients project and set the IoC container as follow:
public partial class MainWindow : Window
    {
        ContainerBuilder builder = null;
        IContainer container = null;

        public MainWindow()
        {
            InitializeComponent();

            // Init Autofac.WCF container
            builder = new ContainerBuilder();
            // Register the channel factory for the service. Make it
            // SingleInstance since you don't need a new one each time.
            builder
              .Register(c => new ChannelFactory<WcfProxies.Proxies.External.IBlogPostService>(
                new WSHttpBinding(),
                new EndpointAddress("http://localhost:9002/BlogPostService")))
              .SingleInstance();
            // Register the service interface using a lambda that creates
            // a channel from the factory. Include the UseWcfSafeRelease()
            // helper to handle proper disposal.
            builder
              .Register(c => c.Resolve<ChannelFactory<WcfProxies.Proxies.External.IBlogPostService>>()
              .CreateChannel())
              .As<WcfProxies.Proxies.External.IBlogPostService>()
              .UseWcfSafeRelease();

            // You can also register other dependencies.
            builder.RegisterType<WcfProxies.Proxies.External.BlogPostClientExt>();

            container = builder.Build();
        }
// Code omitted
Now set the last button click event as follow:
btnNonSharedClientInjected_Click event
private void btnNonSharedClientInjected_Click(object sender, RoutedEventArgs e)
        {
            IEnumerable<WcfProxies.Proxies.External.PostData> _posts = null;

            try
            {
                using (var lifetime = container.BeginLifetimeScope())
                {
                    var _externalProxyInjected = lifetime.Resolve<WcfProxies.Proxies.External.BlogPostClientExt>();
                    _posts = _externalProxyInjected.GetBlogPosts(1);
                }

                if (_posts != null)
                {
                    lbxResult.Items.Clear();
                    foreach (var post in _posts)
                    {
                        lbxResult.Items.Add(post.Title + " by " + post.Author);
                    }
                }
            }
            catch (Exception ex)
            {
                MessageBox.Show(ex.Message);
            }
        }
Discussion
SOAP tooling in or outside of Visual Studio is great but not necessary. We saw in this post that you can create fully functional, extensible and light-weighted WCF proxies in several ways. There are several pros and cons for both SOAP tooling and manual proxy creation so let’s note the most important.
Soap tooling
- One-click generation option. Proxies can start consuming new operation contracts right away
- Heavy objects and not easily extensible
- Cannot share only certain operation contracts existing in a service contract, but always all of them
Manual proxies
- Light-weighted and fully extensible
(Check the IExtensibleDataObject usage) - Easy Dependency Injection integration, hence great testability
- Certain operation contracts can be shared for external clients
(in our case you can remove the GetPost operation contract and the external clients could still consume the WCF service) - In case of the non-shared proxies, the respective operation contracts must be synchronized
(add, edit or remove) after hosting operation contracts change.
Last thing I would like to comment on contract equivalency, is that you can name both Data and Service contracts as you wish, as long as you provide the required name with a attribute as follow:
[ServiceContract(Name = "IBlogPostService")]
public interface IBlogPostServiceRenamed
[DataContract(Name = "PostData")]
public class PostDataRenamed
If you want to read more about Dependency Injection, WCF Unit Testing and IExtensibleDataObject interface, you can read the Depenency injection in WCF post. You can download the source code for this post here.
| Reference: | WCF Proxies – From beginner to expert from our NCG partner Christos Sakellarios at the chsakell’s Blog blog. |

Hi compliment for the article. I have just one question. builder 15 .Register(c => new ChannelFactory( 16 new WSHttpBinding(), 17 new EndpointAddress(“http://localhost:9002/BlogPostService”))) 18 .SingleInstance(); 19 // Register the service interface using a lambda that creates 20 // a channel from the factory. Include the UseWcfSafeRelease() 21 // helper to handle proper disposal. 22 builder 23 .Register(c => c.Resolve<ChannelFactory>() 24 .CreateChannel()) 25 .As() 26 .UseWcfSafeRelease(); When you register your ChannelFactory in Autofac, you never dispose your channel, because the lifetimescope is the WPF application itself. I think this approach can create problems because I think channel factory should works FOR REQUEST… Read more »