This article is based on “SDL2: Setting up SDL2 in Visual Studio (2013 or any other)“, which was published at Programmer’s Ranch on 10th February 2014. This article uses Visual Studio 2015 Community, and although the steps should mostly apply to any version of Visual Studio, I’ve included steps specific to VS2015 because of issues encountered. It also uses a more recent version of the SDL2 library. Finally, it adds a configuration step originally found in “SDL2: Displaying text with SDL_ttf” (Programmer’s Ranch, 29th March 2014). The source code for this article is available here at the Gigi Labs BitBucket repository
SDL2 is a great low-level library for developing games in C/C++ (other language bindings exist). It’s a little bit tedious to set up in Visual Studio the first time, so I’m going to guide you through the process.
For starters you’re going to want to head to the SDL2 download page and grab the latest Visual C++ Development Libraries (at the time of writing, that would be SDL2-devel-2.0.3-VC.zip):
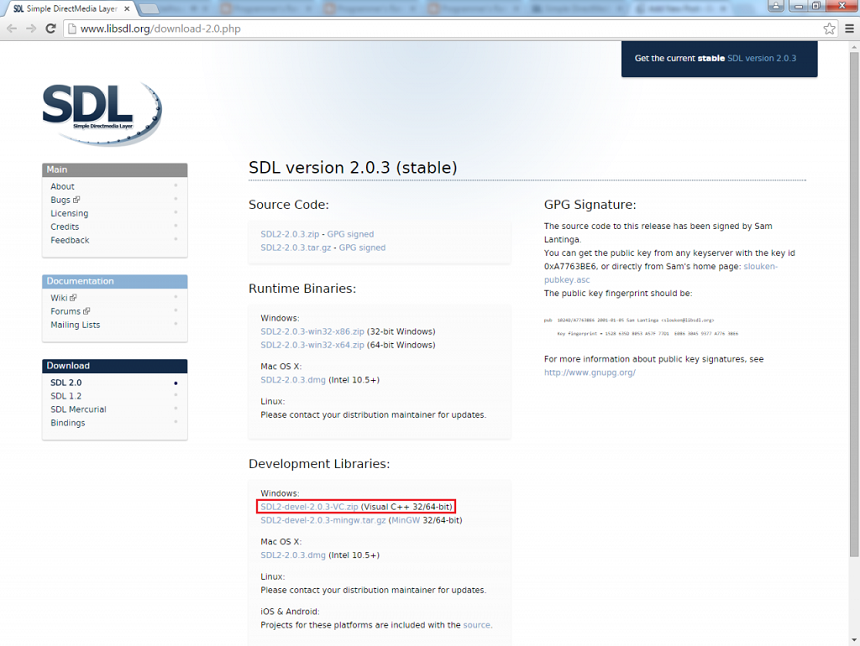
Create a folder for your SDL2 libraries in a convenient location, say C:\sdl2. Extract the include and lib folders in the zip file here.
We can now create an empty Visual C++ project:

We now need to configure our project (via the project’s properties) so that it can work with SDL2.
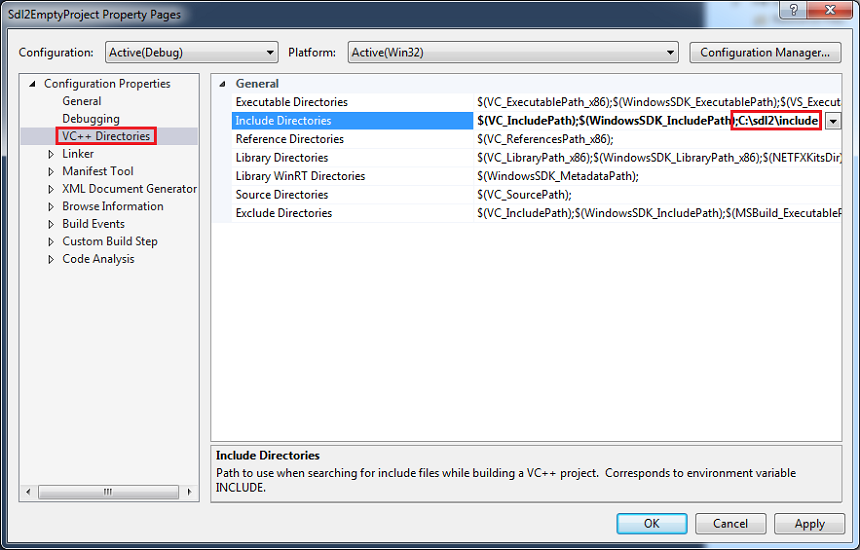
First, we’ll tell Visual Studio where to look for the SDL2 header files, by adding the SDL2 include folder to the Include Directories in VC++ Directories:
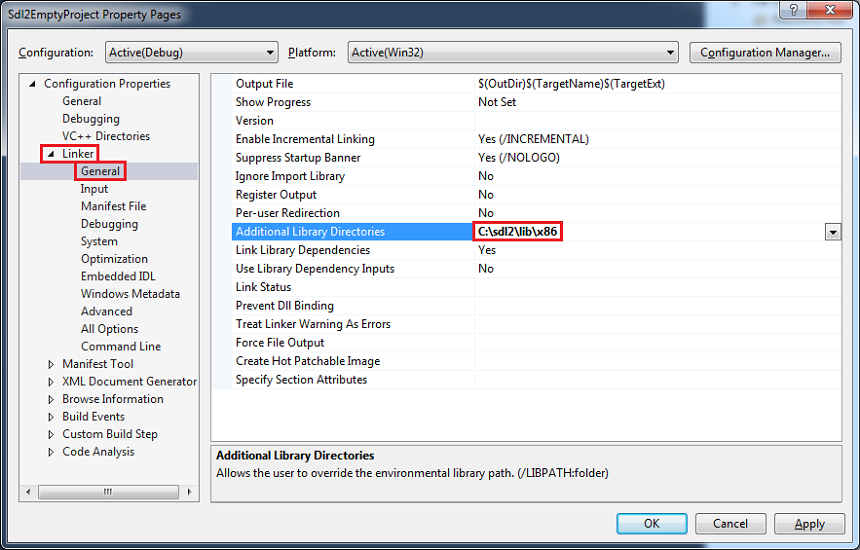
In Linker -> General, set Additional Library Directories to the path to the SDL2 library – either x86 or x64:
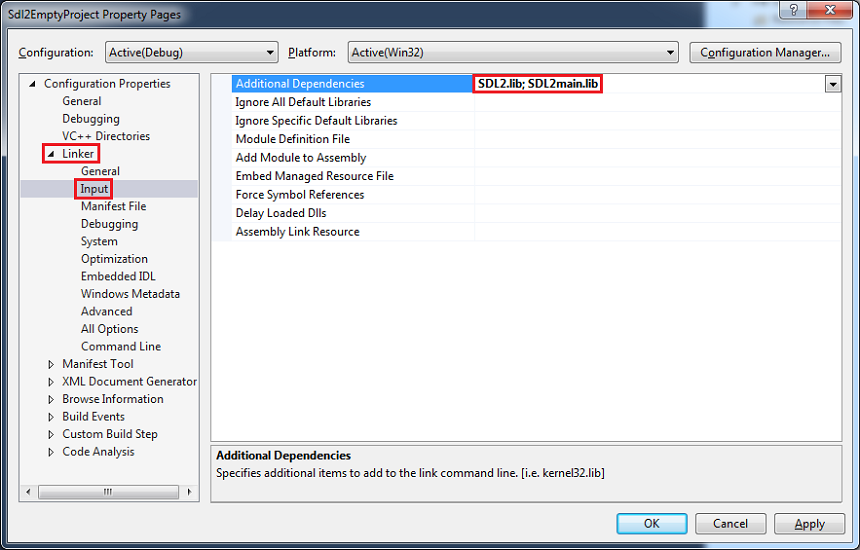
Then in Linker -> Input, replace the value of Additional Dependencies with “SDL2.lib; SDL2main.lib“:
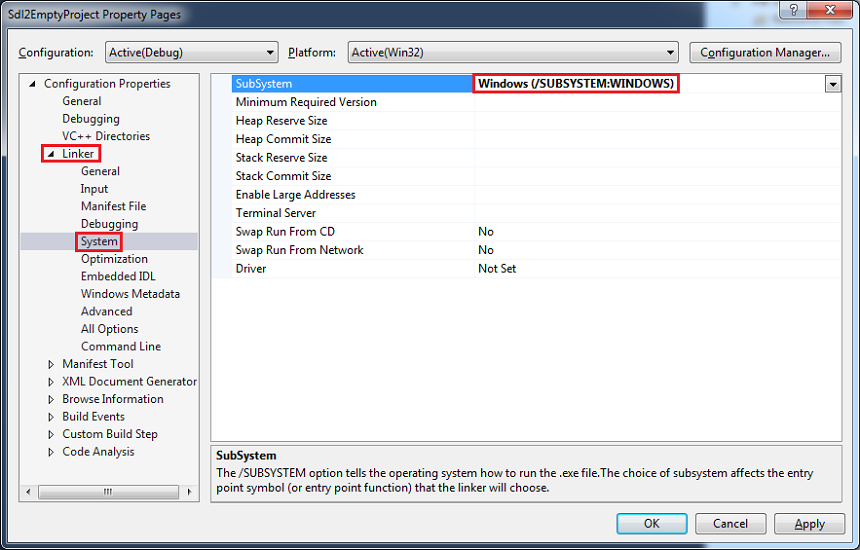
Finally, in Linker -> System, set SubSystem to Windows (/SUBSYSTEM:WINDOWS):
That should be all the configuration you need to get started.
Now, let’s add a new main.cpp file under Source Files, and add some code just to see whether it works:
#include <SDL.h>
int main(int argc, char ** argv)
{
SDL_Init(SDL_INIT_VIDEO);
// game code eventually goes here
SDL_Quit();
return 0;
}
Press Ctrl+Shift+B to build, and lo and behold…
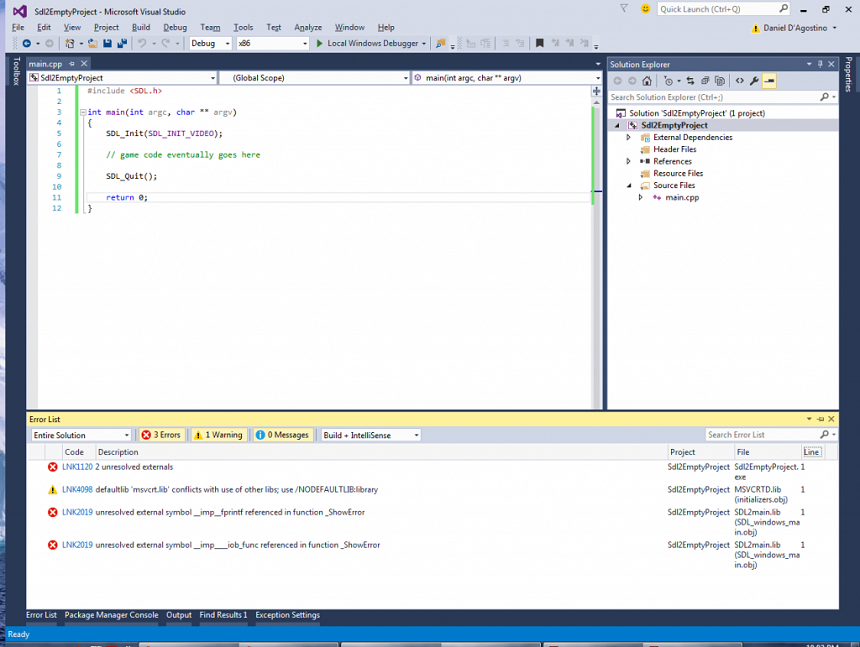
Crap.
Well, until VS2013, these steps used to work, as you can see from the Programmer’s Ranch article “SDL2: Setting up SDL2 in Visual Studio (2013 or any other)“.
Some insights as to the nature of the problem can be found in this StackOverflow thread and this gamedev.net thread. Quoting the latter:
VS2015 contains a completely rewritten CRT with many bug and conformance fixes. It’s not surprising that this kind of breakage happened; it’s not clear if this is a temporary bug with the CRT being incompatible or if all static libraries (like SDL2main) will have to be recompiled for VS2015’s runtime.
So basically, until this is resolved, throw out your C:\sdl2 folder, and instead make a new one from the latest SDL2 build for Visual Studio. Be sure to rename your lib\win32 folder to lib\x86 so that the earlier settings will apply (or change the path in the settings). Sorry, you can’t use this method for x64 just yet.
Try building again, and it should now succeed.
Press F5 to run the program, and you should get a nice runtime error message:
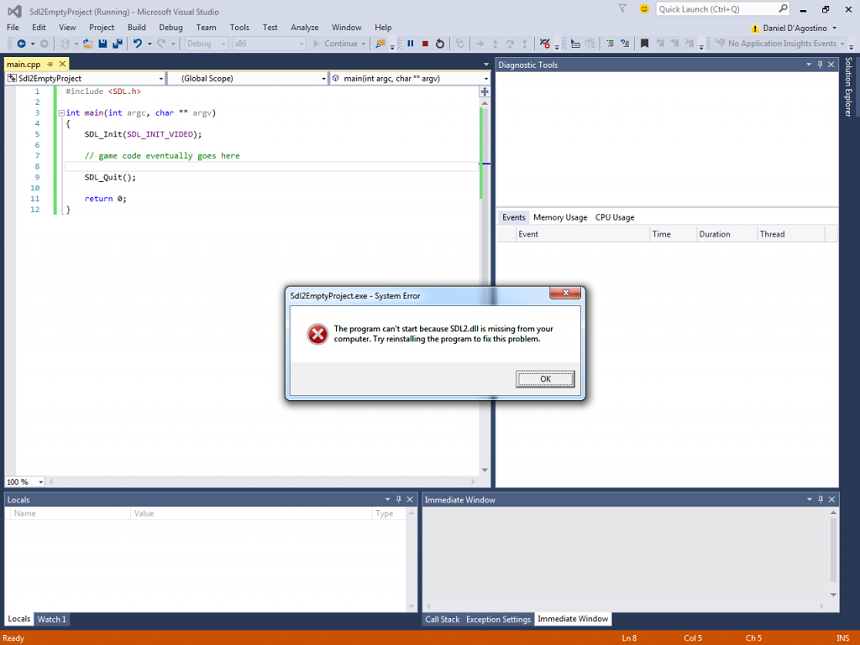
Fortunately, the error is pretty clear. Grab SDL.dll from C:\sdl2\lib\x86 and put it in your project’s Debug folder, where the executable is being generated:
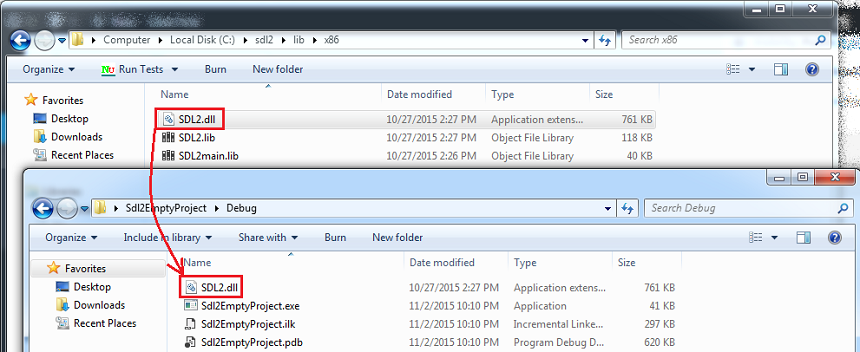
You should now be able to run the program without errors. It doesn’t do anything, but you can use it as a basis for any SDL2 code you’ll write. You can find this empty project here at the Gigi Labs BitBucket repository, or else follow the steps in TwinklebearDev’s tutorial to export a Visual Studio template from the project.
Finally, there’s an additional configuration setting that you’ll find handy if you’re going to be loading resources from files (e.g. images, fonts, etc). In your project’s properties, go to the Debugging section and change the value of Working Directory from $(ProjectDir) to $(SolutionDir)$(Configuration)\:
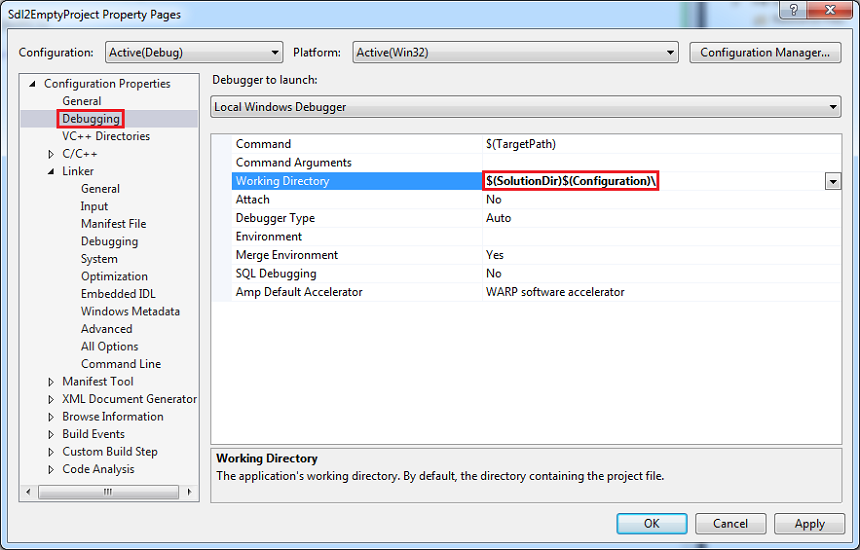
Why are we doing this? By default, the program will use a different working directory depending on whether you run it from Visual Studio or directly from the executable. So if it has to look for a particular file in the current directory, this won’t work in both scenarios unless you copy the same file into both the project folder and the output folder. With the above setting, we are telling Visual Studio to run the program with its working directory as the Debug folder, thus aligning the two scenarios.
| Reference: | SETTING UP SDL2 WITH VISUAL STUDIO 2015 from our NCG partner Daniel DAgostino at the Gigi Labs blog. |